How it works
Set up once. Mount in 5 minutes.
The ZeroDrift™ workflow from CAD to verified occlusion — install in 15 minutes, calibrate once, and every printed model after that mounts magnetically at ±0.02 mm.
One-time setup — 15 minutes, once.
Direct kit (Artex · SAM · ASA)
Omni Flex (any articulator)
Print the two install files from the STLs you receive at purchase, join the lower part, and mount: Artex clips straight onto the split-cast, SAM 3 installs by swapping the internal bolt with the ones included, ASA 50 and 51 take the plates directly. Reversible — no permanent modification to your articulator.
Direct install — 90 seconds
TrueZero™ — the step nobody else has
Print the calibrator on your printer, with your resin. Whatever systematic error your printer has is inside the calibrator AND inside your models — they cancel out. You’re verifying the whole system, not just the model. 15 minutes, once.
Every case after that — 5 minutes at the bench.
1
Design where you already work.
Apply the DACOS attachments inside Model Creator — dedicated libraries for Exocad, 3Shape and Blender for Dental are included with every kit. Choose your magnet positions right in CAD.

Inside Model Creator — 45 seconds

2
Print flat.
ShieldBase™ geometry keeps models flat on the build plate — no 45° tilting, no bulky bases. Less resin, shorter prints, cleaner surfaces.
3
Place the magnets.
Four magnets per model, seated with the GluJet in the exact positions you chose in CAD — DockingMatrix™’s 9 configurations keep them clear of implant analogs. One MagGrip 50 pack covers 12+ cases.
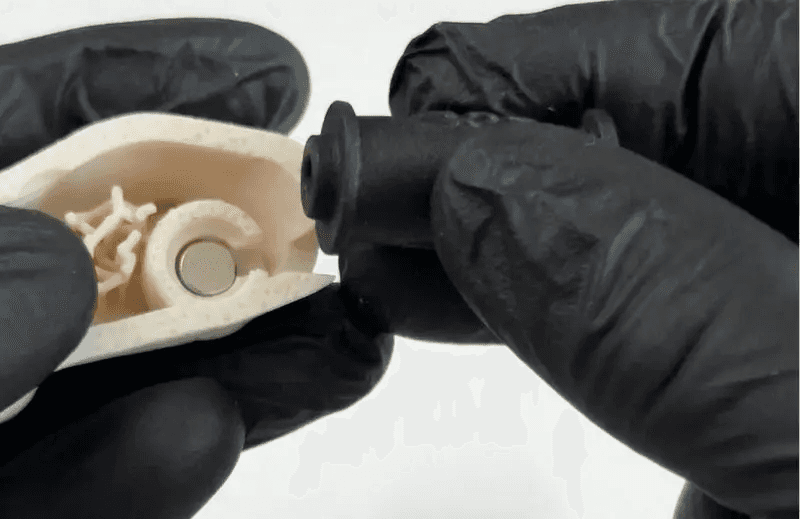
GluJet magnet placement — real use

The remount — pin back to zero
4
Mount. Check. Remount.
Click the model on. Verify the contacts you designed. Take it off, put it back — the incisal pin returns to zero. Every remount, in 5 minutes.
Measured, not promised.
The ±0.02 mm figure comes from repeated remounts measured with a digital indicator, every variable under control. Labs in 30 countries run this workflow daily.