Cookie settings

Choose what we may use beyond the necessary cookies. You can change this any time from Cookie settings at the bottom of every page.

Menu

Search the site

    exocad · Model Creator

    DACOS Omni for exocad

    Two libraries in Model Creator. The plate library sets the height of the model, the attachment library places the DACOS magnetic attachments in the layout your case needs. Same plates, same calibrator, same offset.

    • Model Creator
    • Light, Ultra, Ultra Extended, Frame
    • Included with your kit
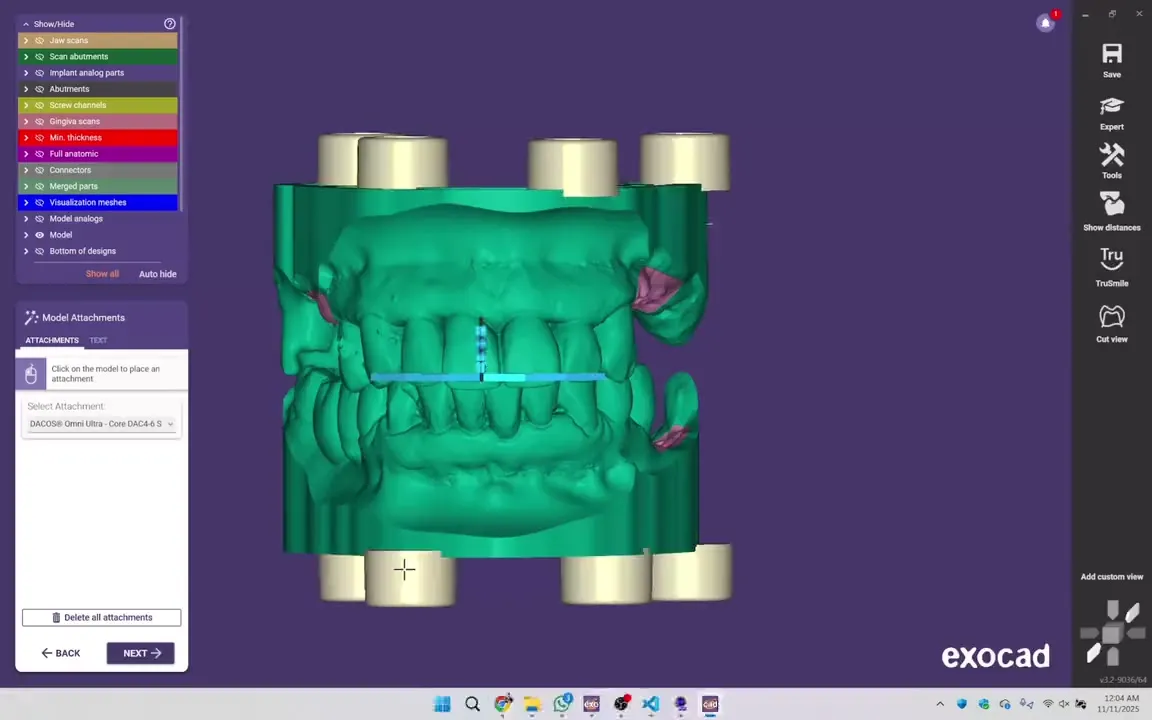
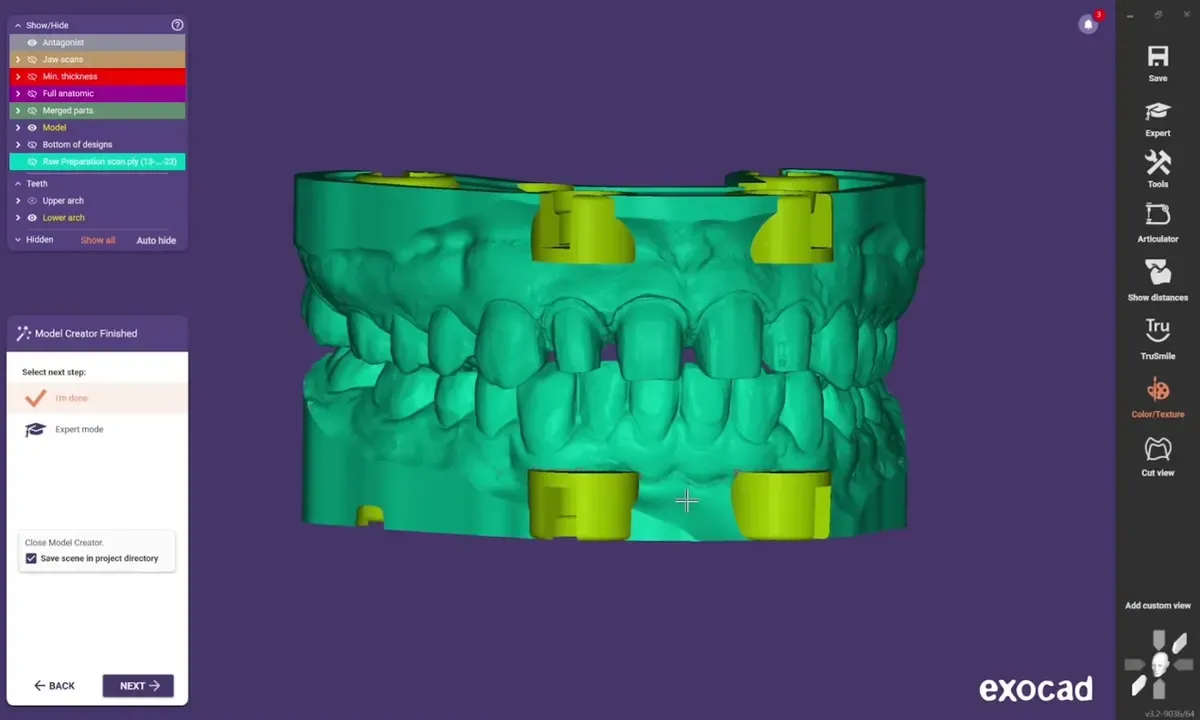
    exocad Model Creator placing the DACOS Omni attachments on a printed model design

    What you install

    Two libraries, one rule.

    • Required

      Attachment library

      It places the four DACOS attachments on the model at the last step of Model Creator. Light, Ultra, Ultra Extended and Frame, nine combinations each.

    • Optional

      Plate library

      Choose DACOS Omni as plate type and the height of the model is set for you.

    • Offset

      The rule

      The calibrator and the attachment library always use the same offset. If you use the plate library, it follows the same offset too.

    One download per tier and per offset, in English or Italian. You take the offset your fitting test selected.

    Before you start

    Calibration first, CAD after.

    Print the fitting test of the TrueZero™ calibrator with the printer, resin and post-curing you use for your models. Keep the offset that seats fully, stays stable and does not rotate on the Omni plate. That offset is the one you download and the one you select in your CAD.

    How the TrueZero™ calibrator works

    Install

    Install once.

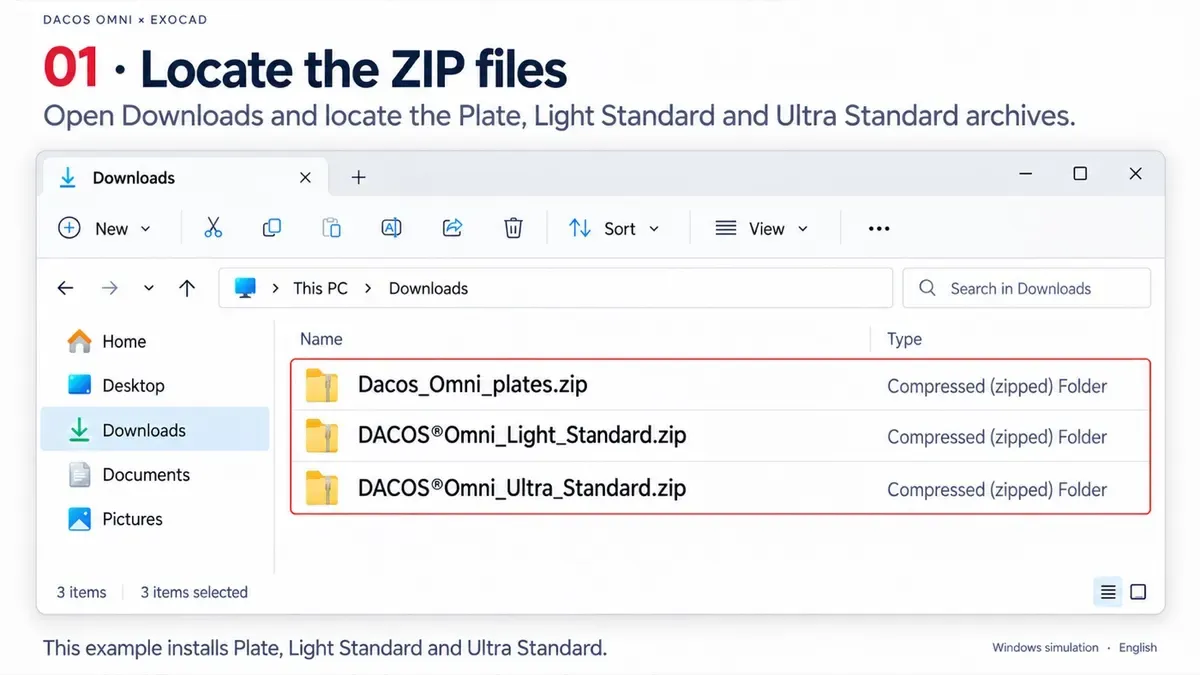
    1. By hand, from the ZIP files.

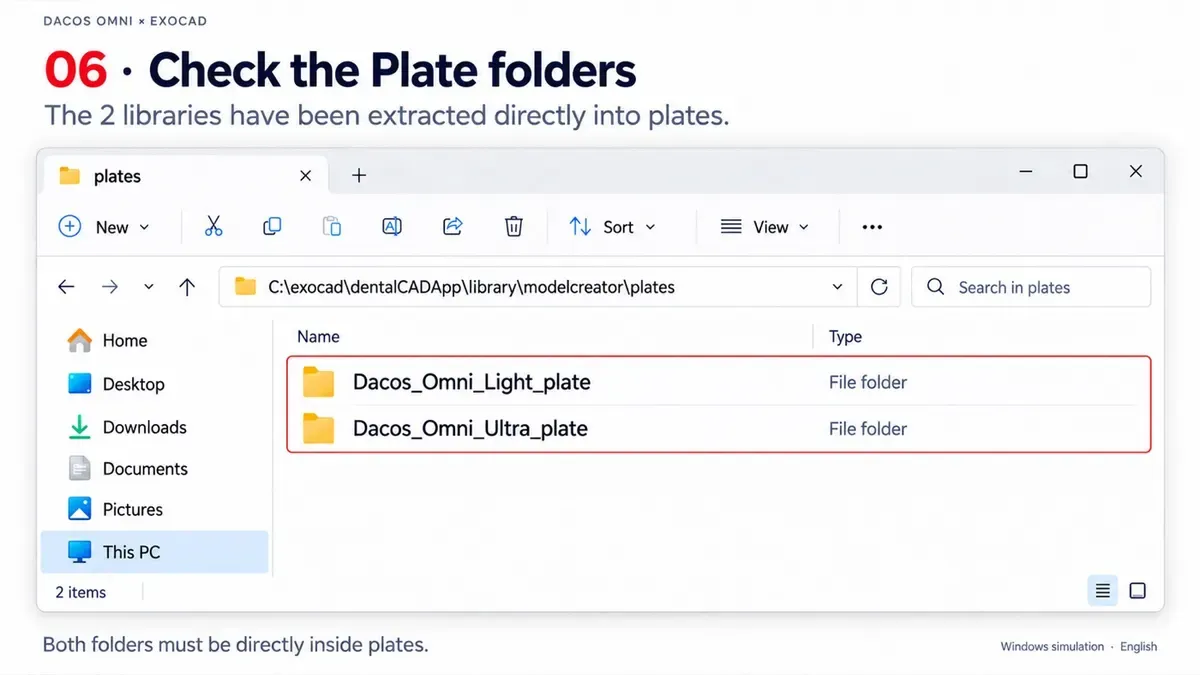
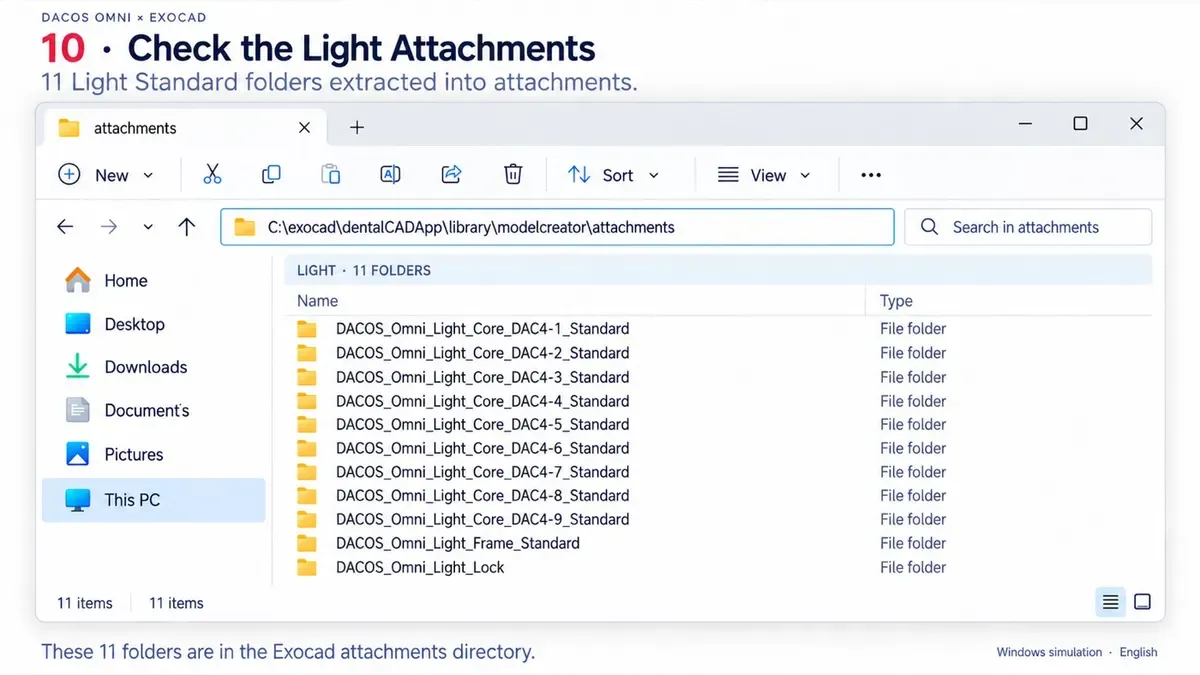
      Extract the ZIP files, never copy the archives. Plates go into the plates folder of Model Creator, attachments into the attachments folder, under C:\exocad\dentalCADApp\library\modelcreator.

    2. Then restart exocad and Model Creator.

      The libraries appear in the menus only after the restart. The hub guide shows how many DACOS folders you should see for your tier.

    Hub lesson: Install the exocad libraries, 12 illustrated steps

    Hub install guide, step 1: the DACOS library ZIP files extracted, never copied as archives
    Hub install guide, step 6: the DACOS plate folders inside the Model Creator plates folder
    Hub install guide, step 10: the DACOS Light attachment folders inside the Model Creator attachments folder

    Design

    From the model to the attachments.

    1. Choose the model path.

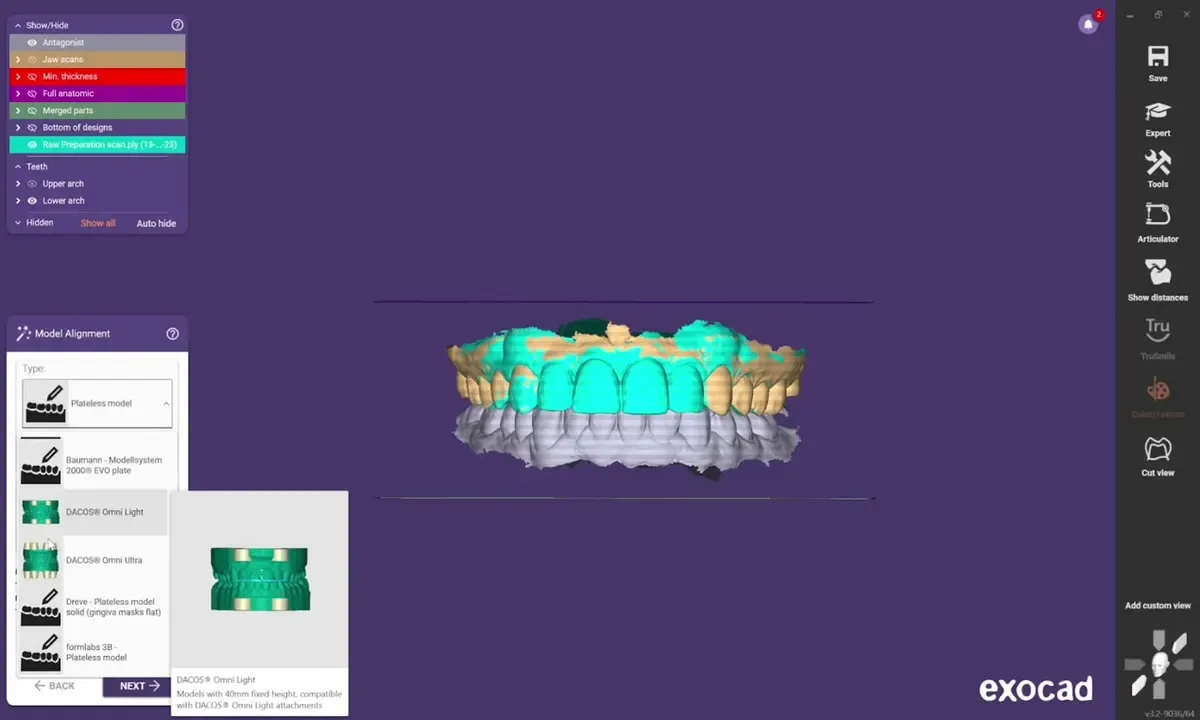
      With the plate library, pick DACOS Omni and the configuration: the height is automatic, do not edit it. For cut-out dies, flat gingiva or a custom base, build a Plateless model at the minimum height: 40 mm for Light, 55 mm for Ultra, 40 mm with Ultra Extended.

      Hub lesson Introduction: models and heights (1:09)

      exocad Model Creator: choosing the DACOS Omni plate type and the model height
    2. Generate the model.

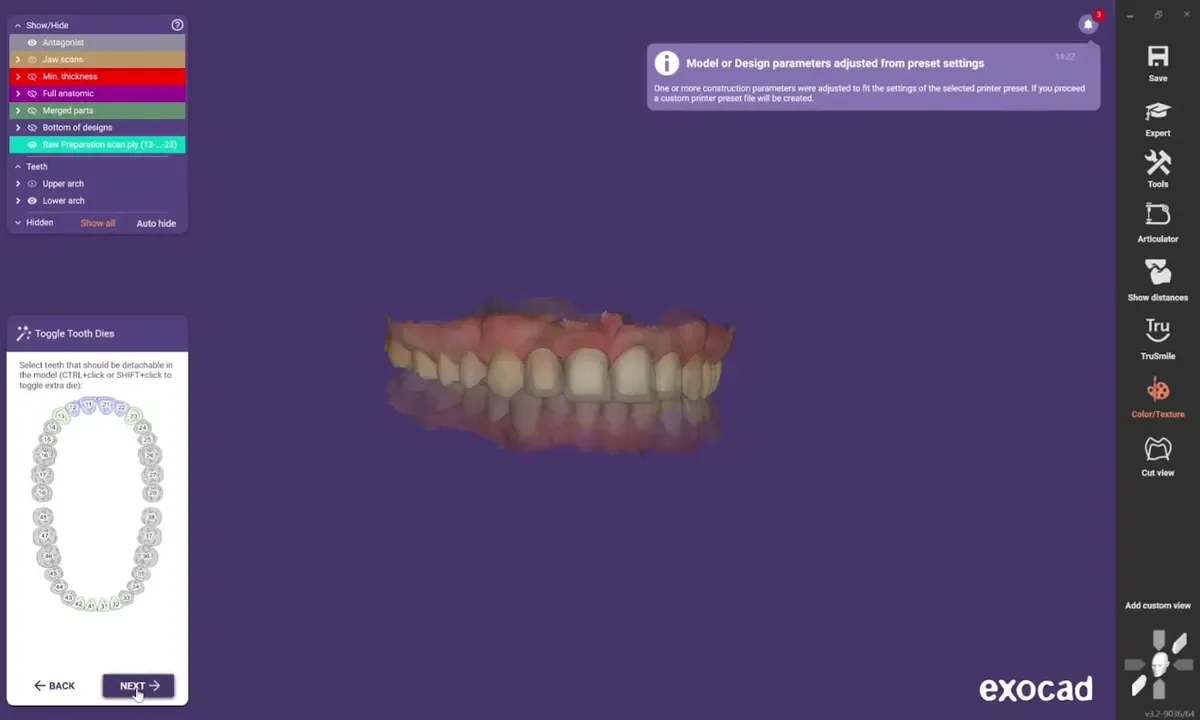
      Light keeps the model short, prints fast and uses less resin. Ultra gives a taller body for full arch and implant cases.

      Hub lesson Light: model and attachments (2:13) · Ultra: 55 mm model (0:43)

      exocad Model Creator: a Light model generated on the DACOS Omni plate
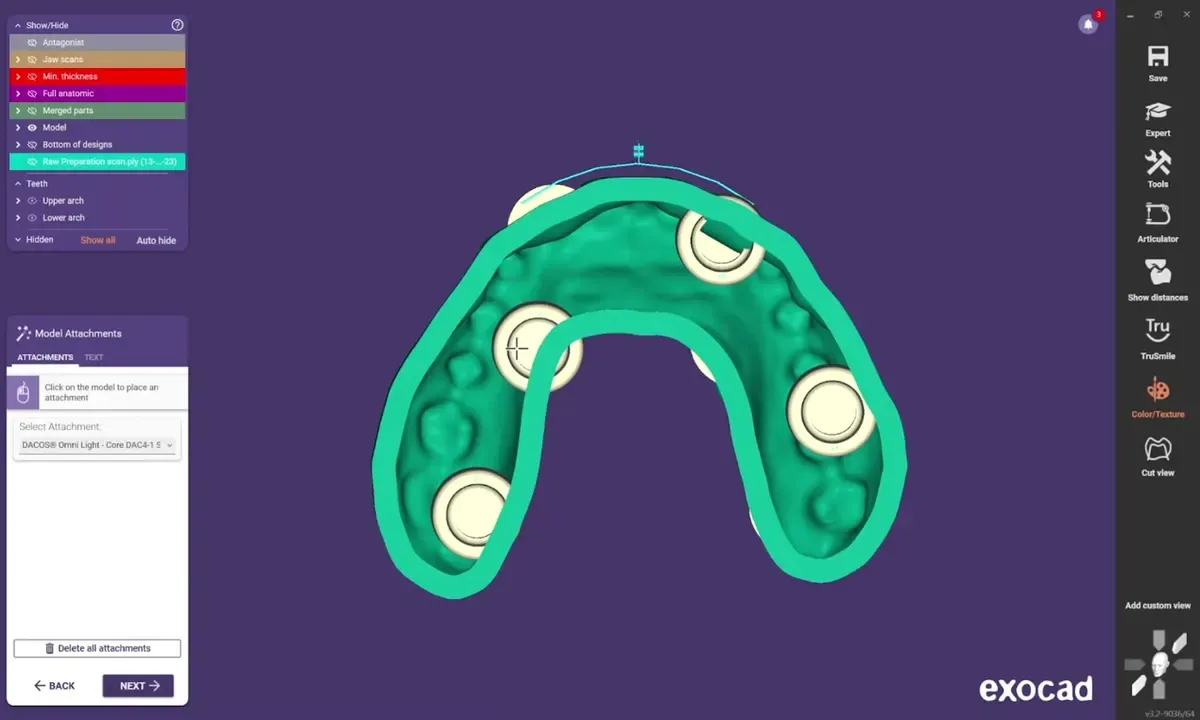
    3. Place the attachments.

      Same version as the model: Light with Light, Ultra with Ultra. There are always four. No analogs: 4-5. With analogs: the combination that does not intersect them.

      Hub lesson Light: model and attachments (2:13)

      exocad Model Creator: the DACOS attachments placed in the 4-5 combination
    4. Keep the reference.

      Single attachments never move. You can move the whole combination, in XY only, so the occlusal plane never tilts. The blue occlusal plane is a visual reference: it must not touch the model, or it cuts it.

      Hub lesson Light: model and attachments (2:13)

      exocad Model Creator: the blue occlusal plane kept clear of the model
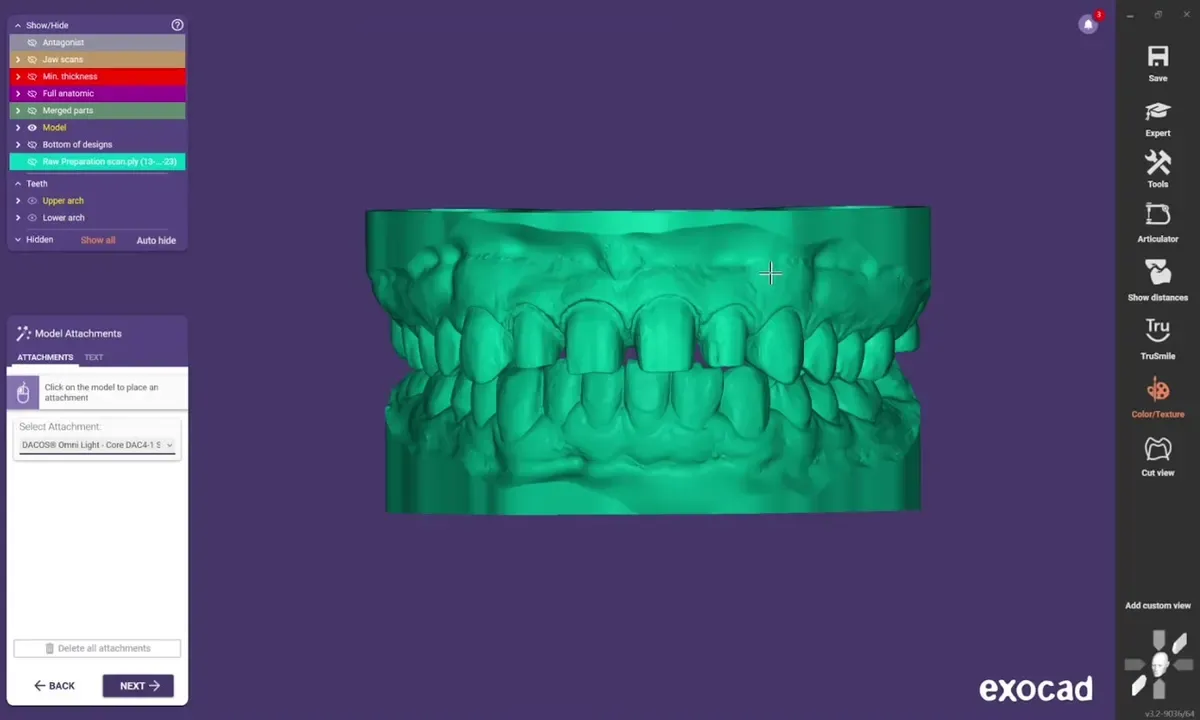
    5. Export and print.

      Flat on the platform, supports under the base, none on the seating step. Same printer, resin and settings as the calibrator.

      Hub lesson Slicing the models, flat (1:57) · Cleaning and post-curing (0:55)

      exocad: the finished DACOS Omni model ready for export

    Analogs on Ultra, Half arches

    Analogs on Ultra

    Ultra Extended, the move for analogs.

    With Ultra and implant analogs, build the model at 40 mm and select Ultra Extended. The attachments are pre-extruded, the magnets stay at the Ultra height, and the analogs keep their room. It also answers a frequent question: the Boolean subtraction cuts the base slightly even where there is no attachment, because the plate carries its magnets in every position. With Ultra Extended at 40 mm the model keeps its seat.

    Hub lesson: Ultra Extended: 40 mm model (0:48)
    Half arches

    Frame for quadrants and half arches.

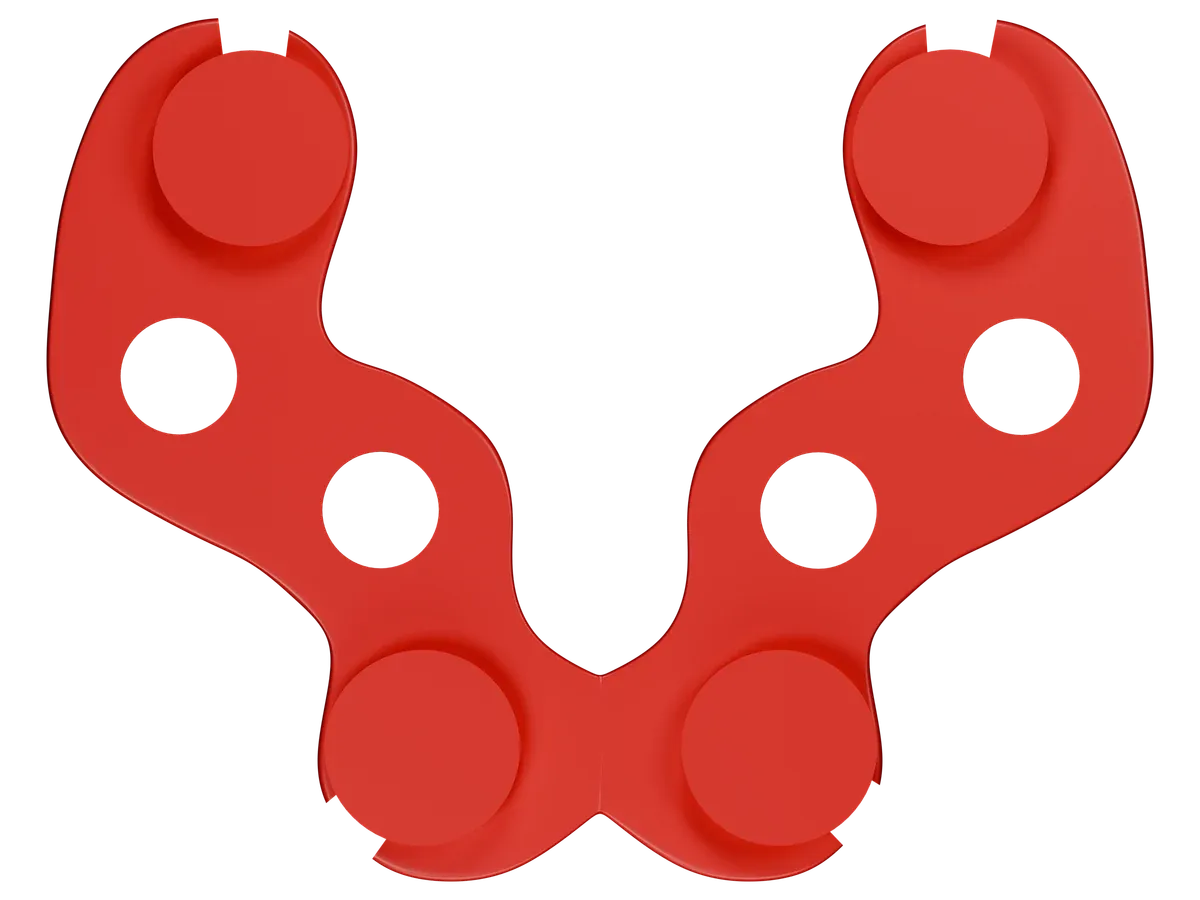
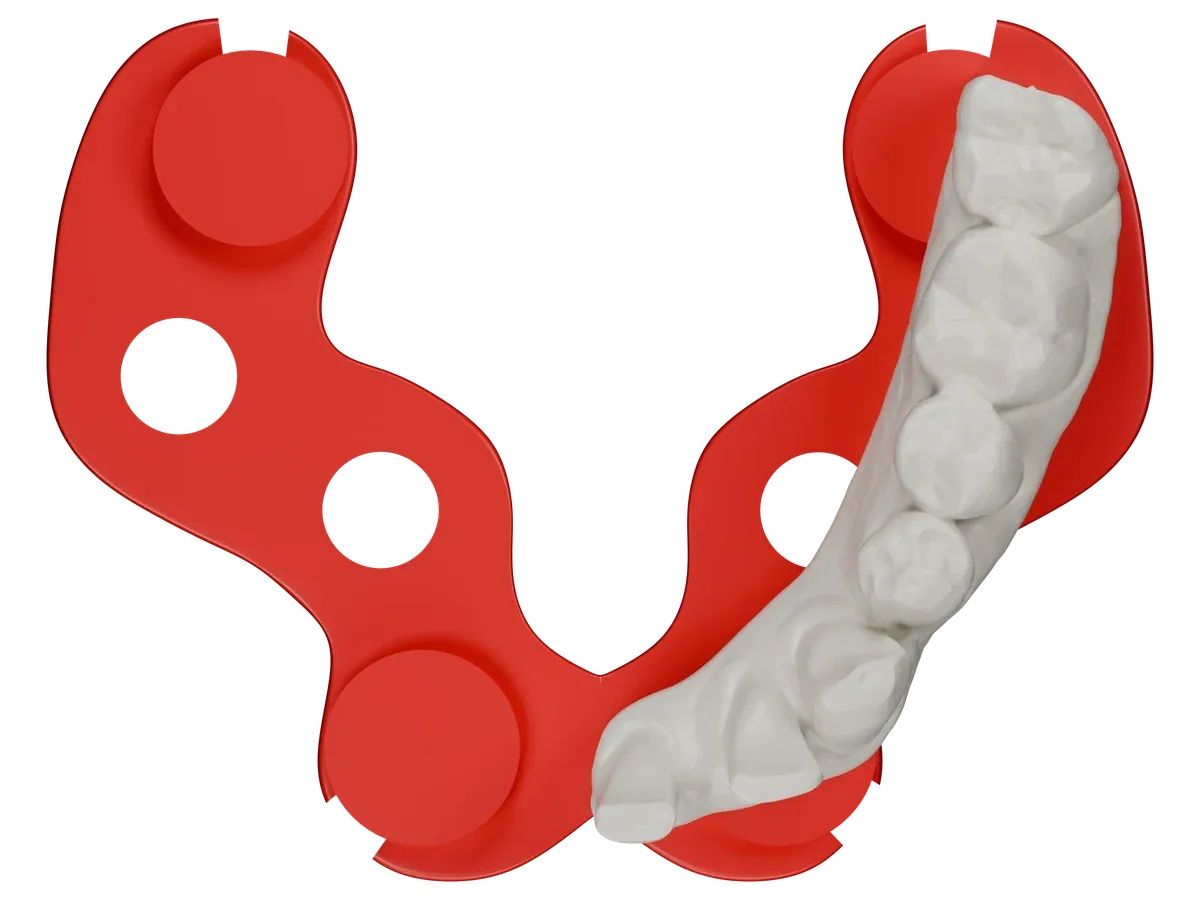
    The Frame joins the four sockets in one unified base, so a half arch model prints and seats as one piece. There is one Frame version.

    Hub lesson: Frame: half-arch models (0:48)

    DockingMatrix™ Configuration

    Choose the layout.

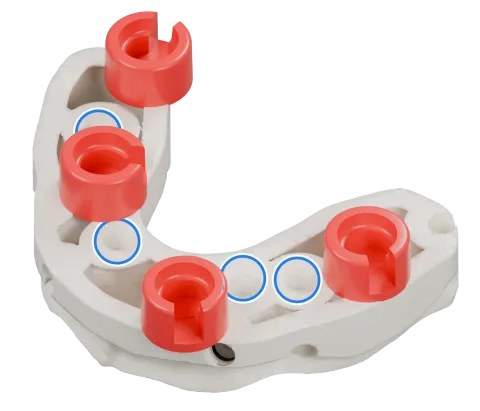
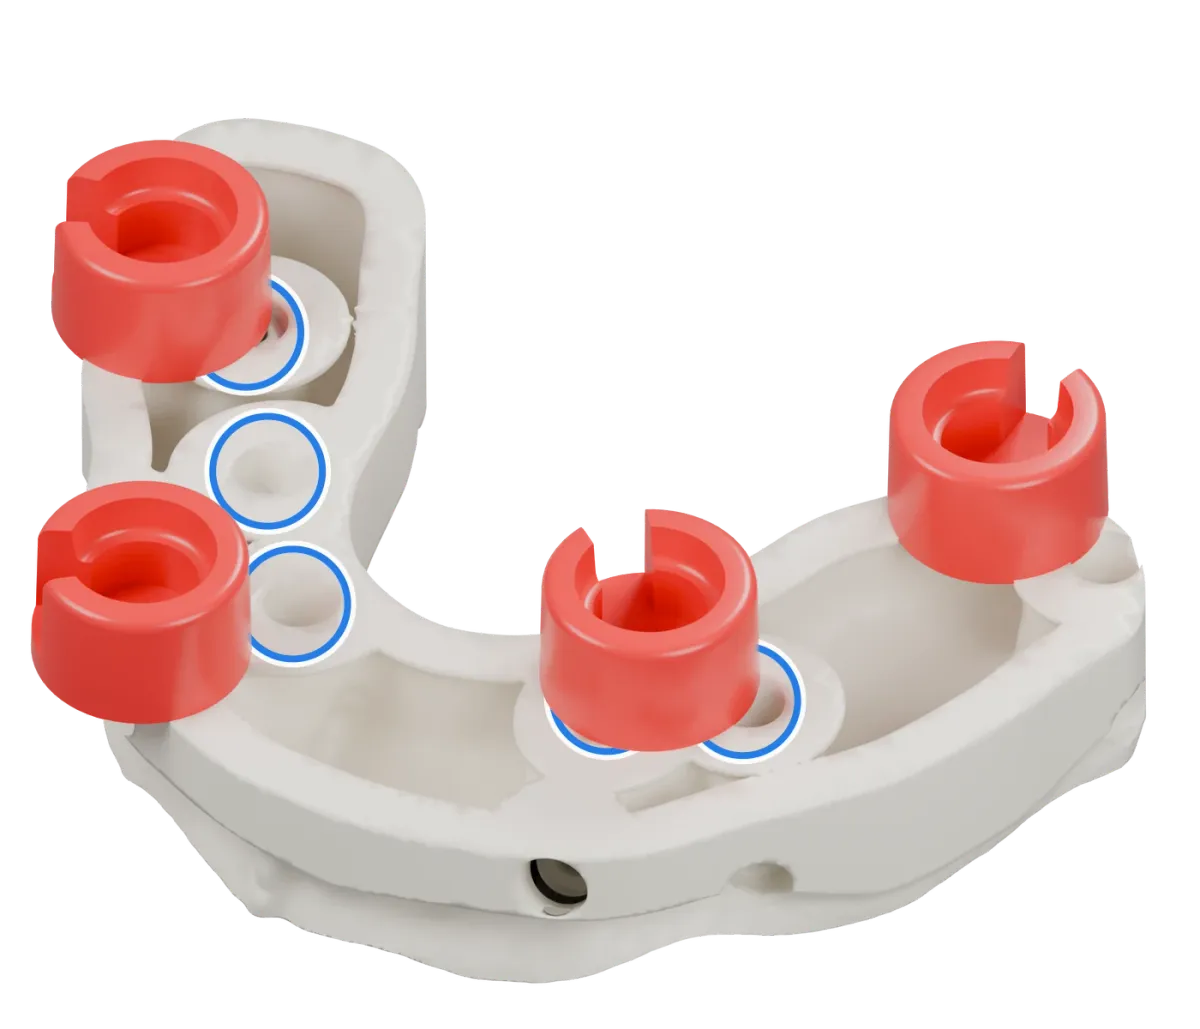
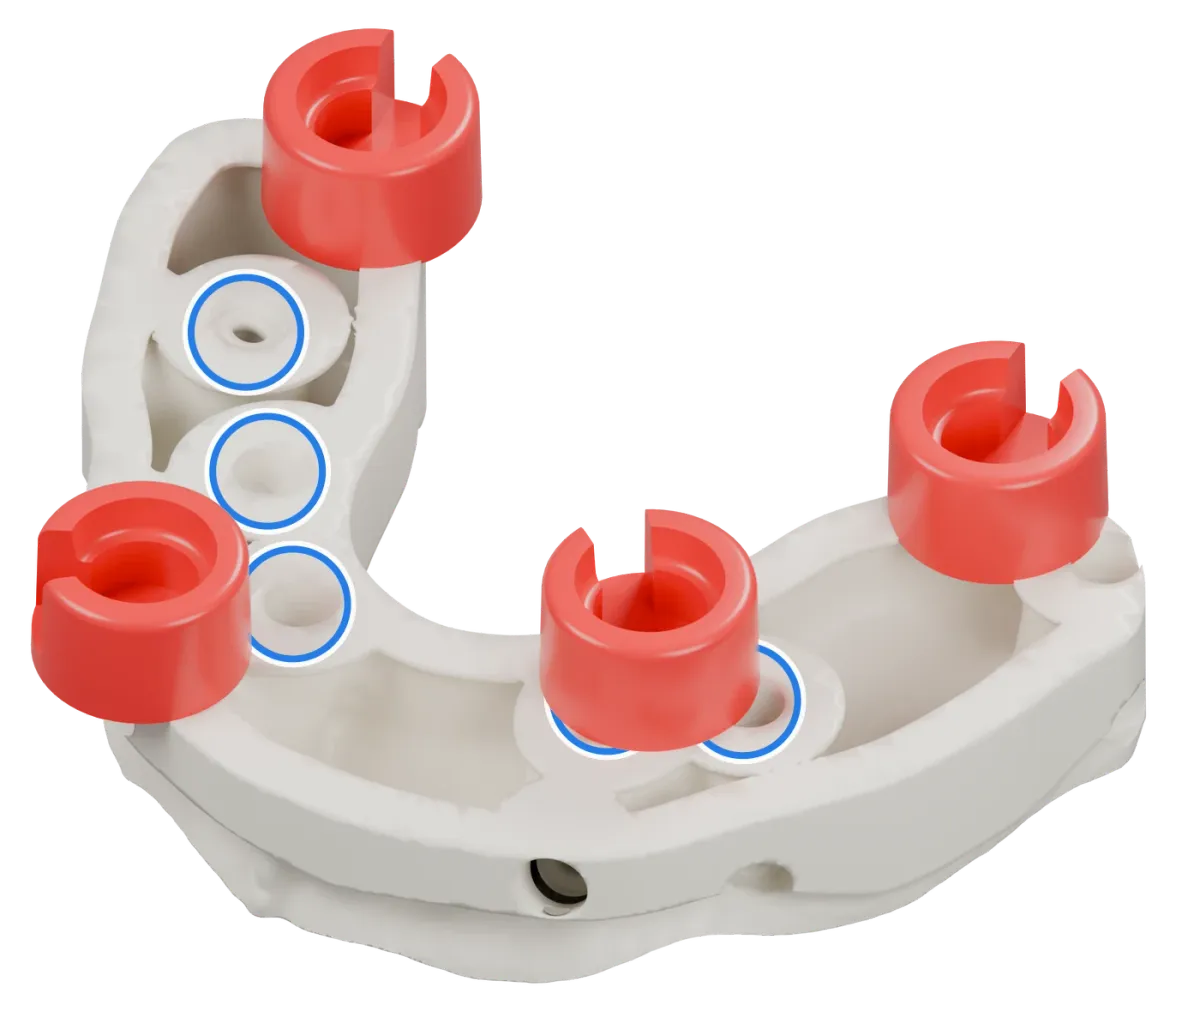
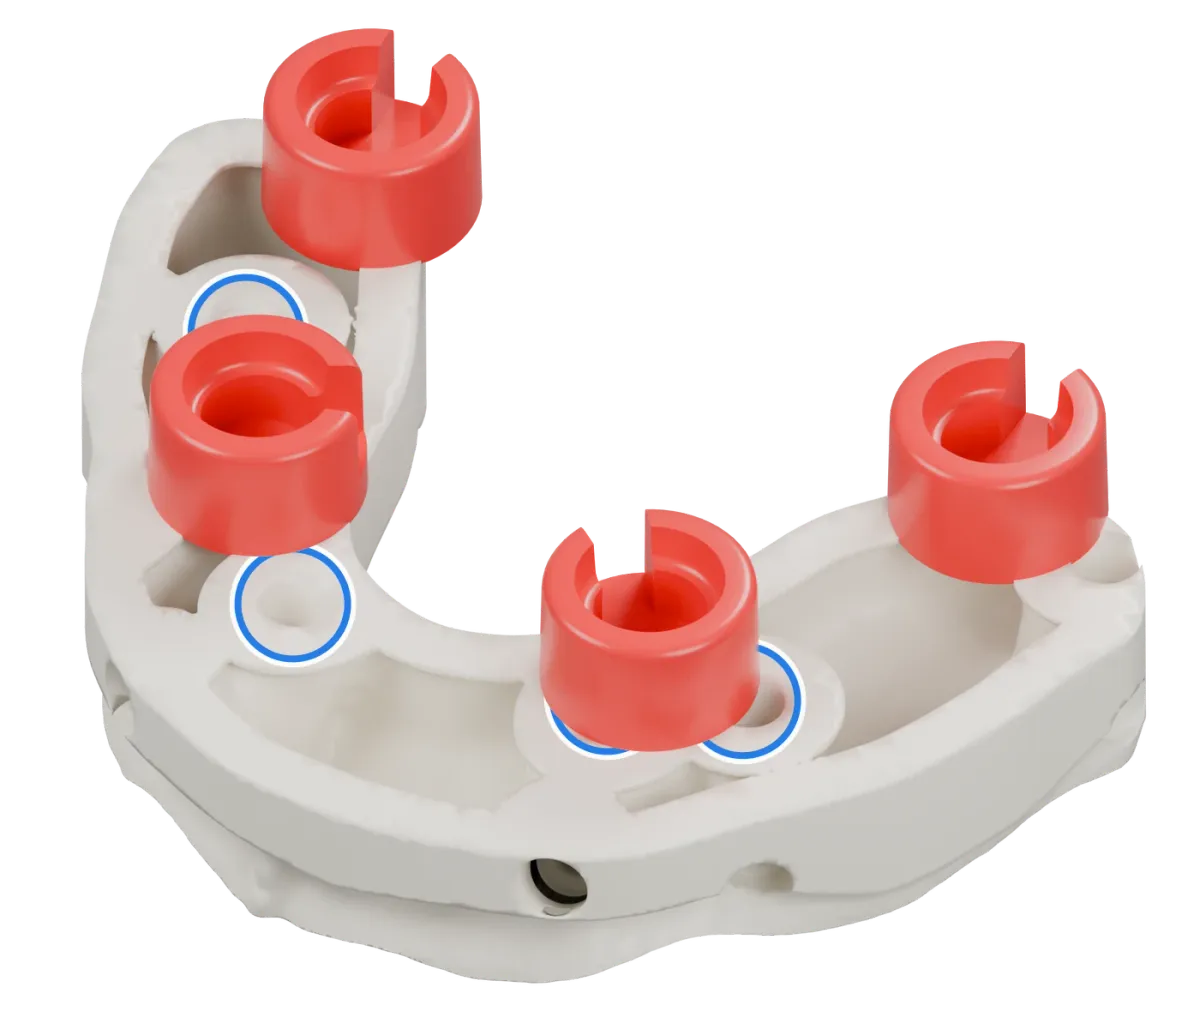
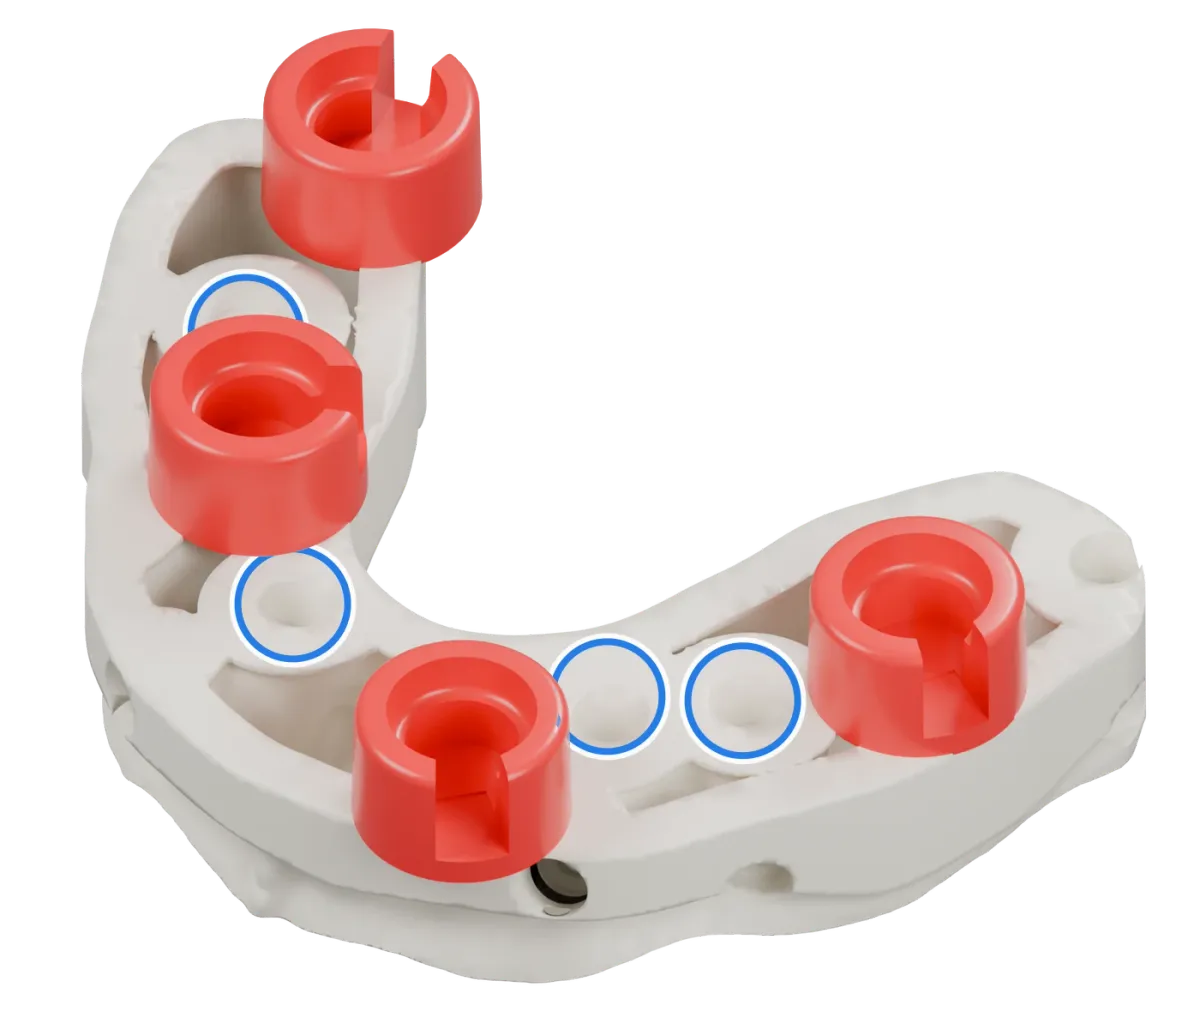
    Nine combinations for Light, Ultra and Ultra Extended. No analogs: 4-5. With analogs: the combination whose sockets stay clear.

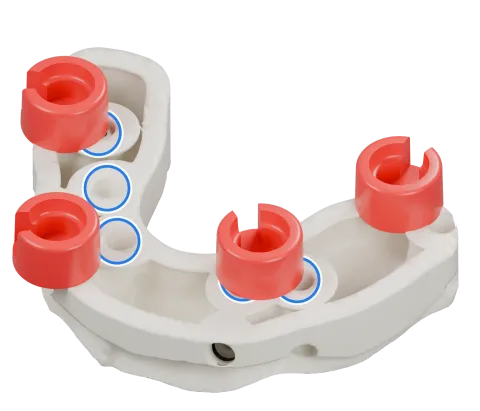
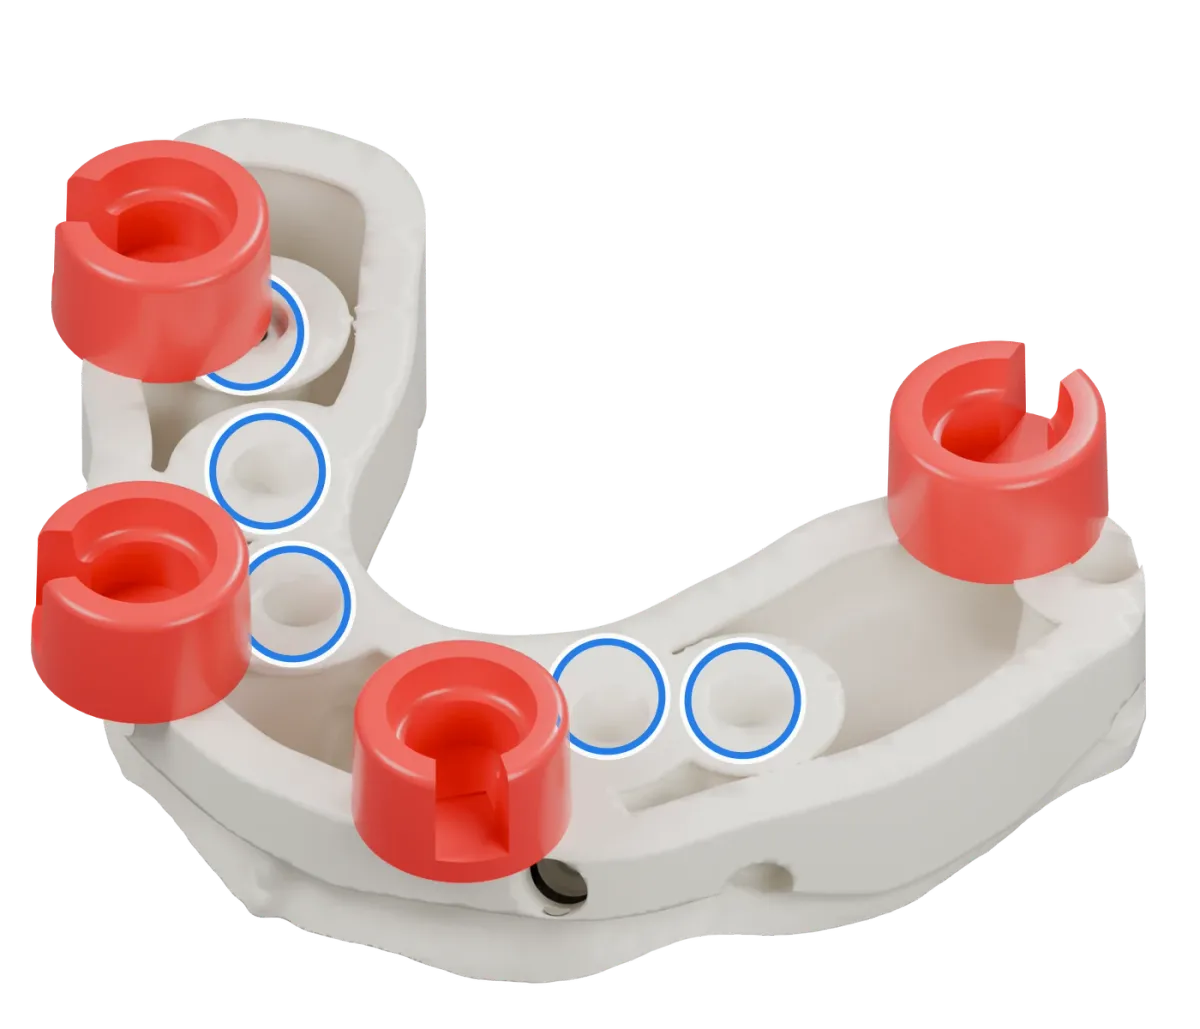
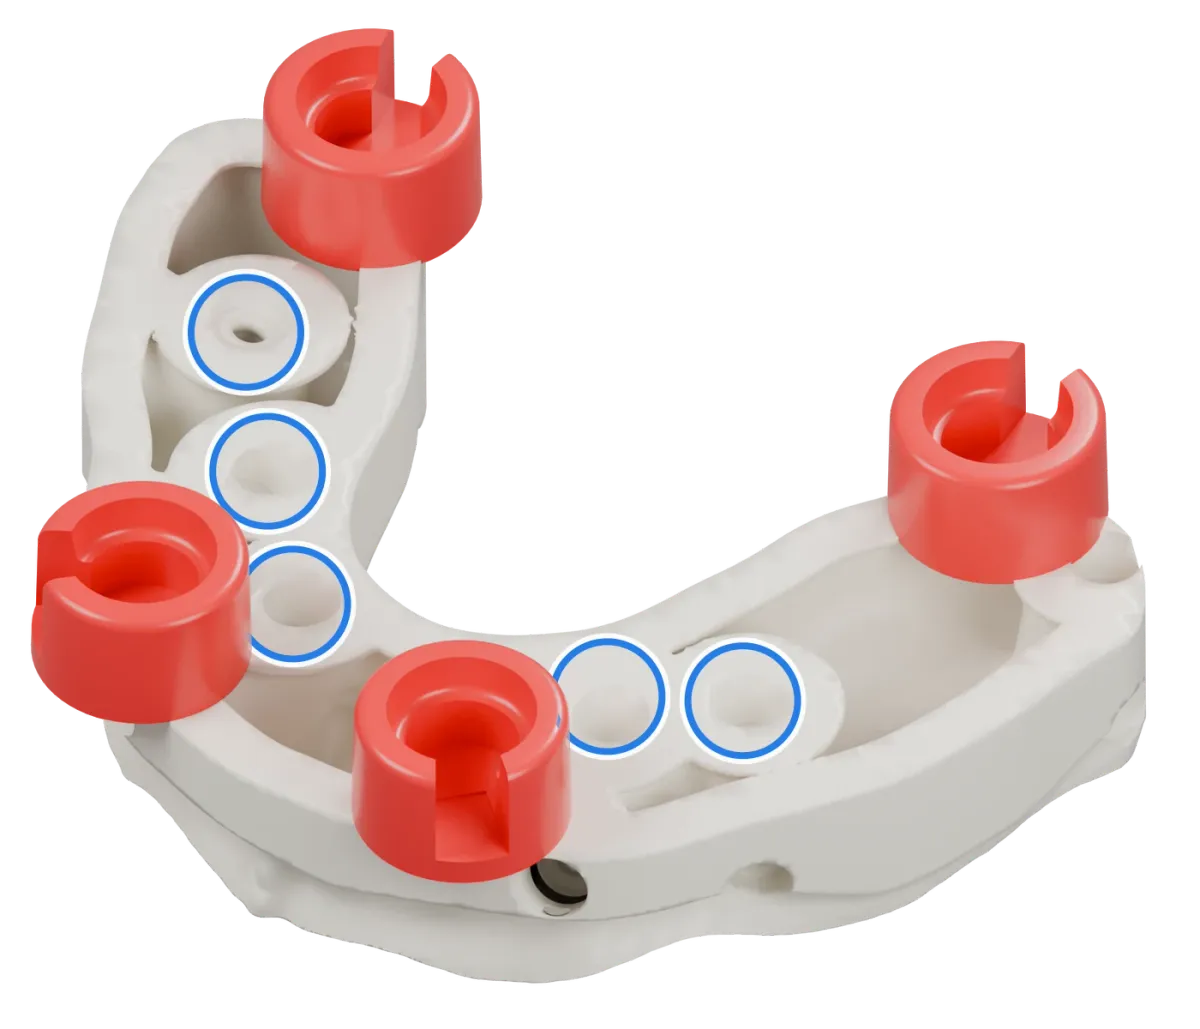
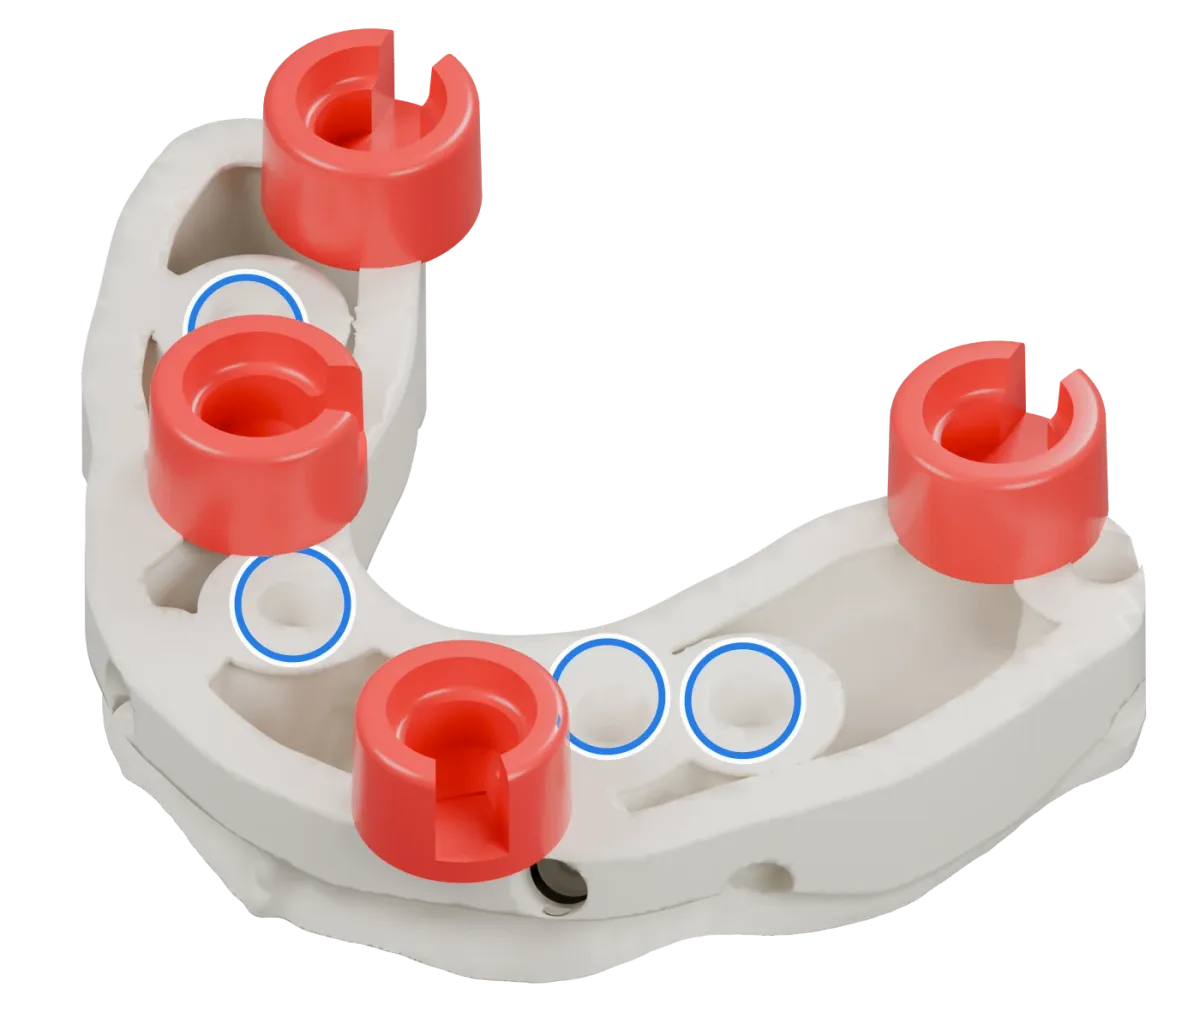
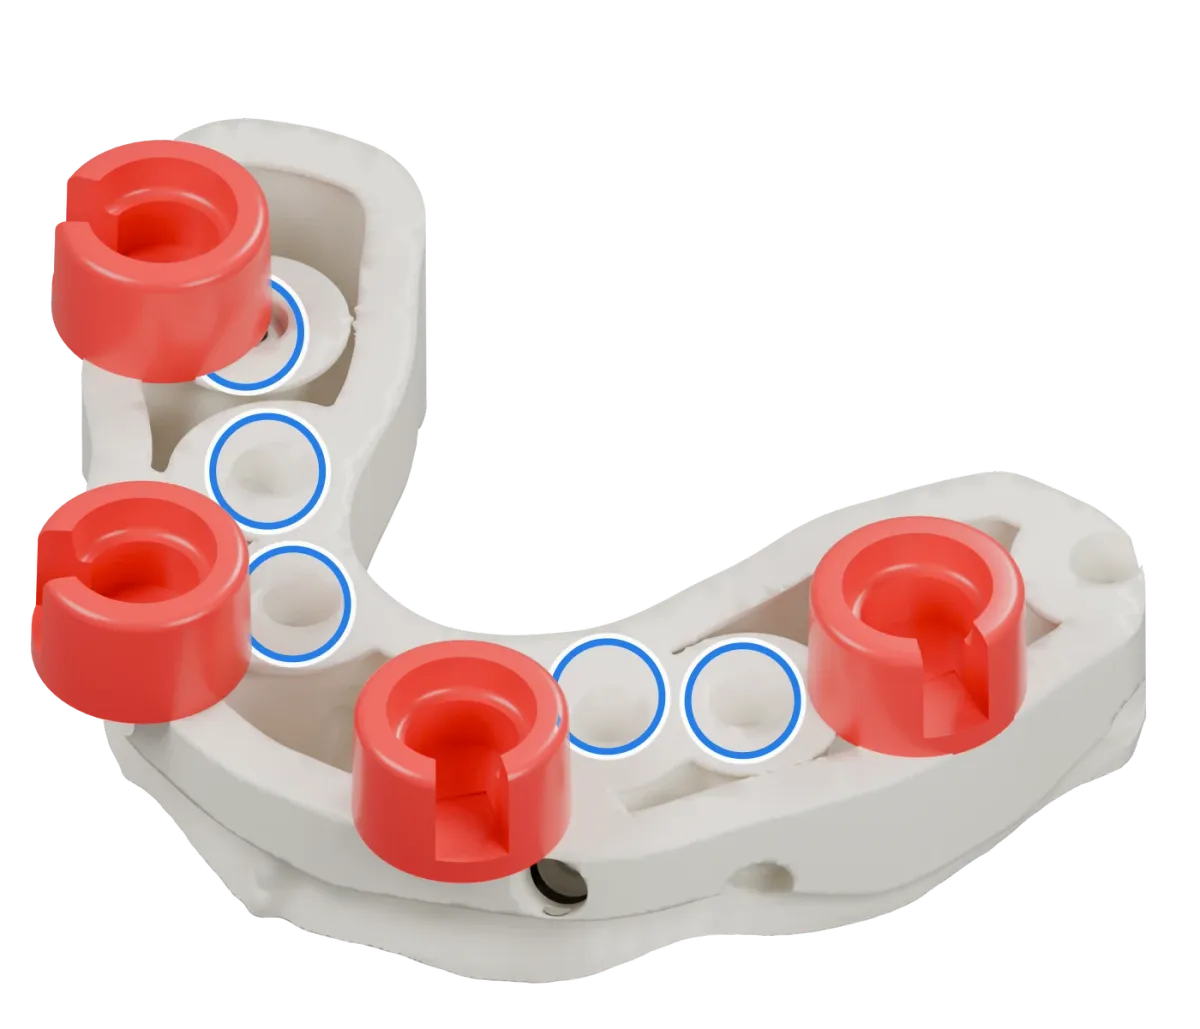
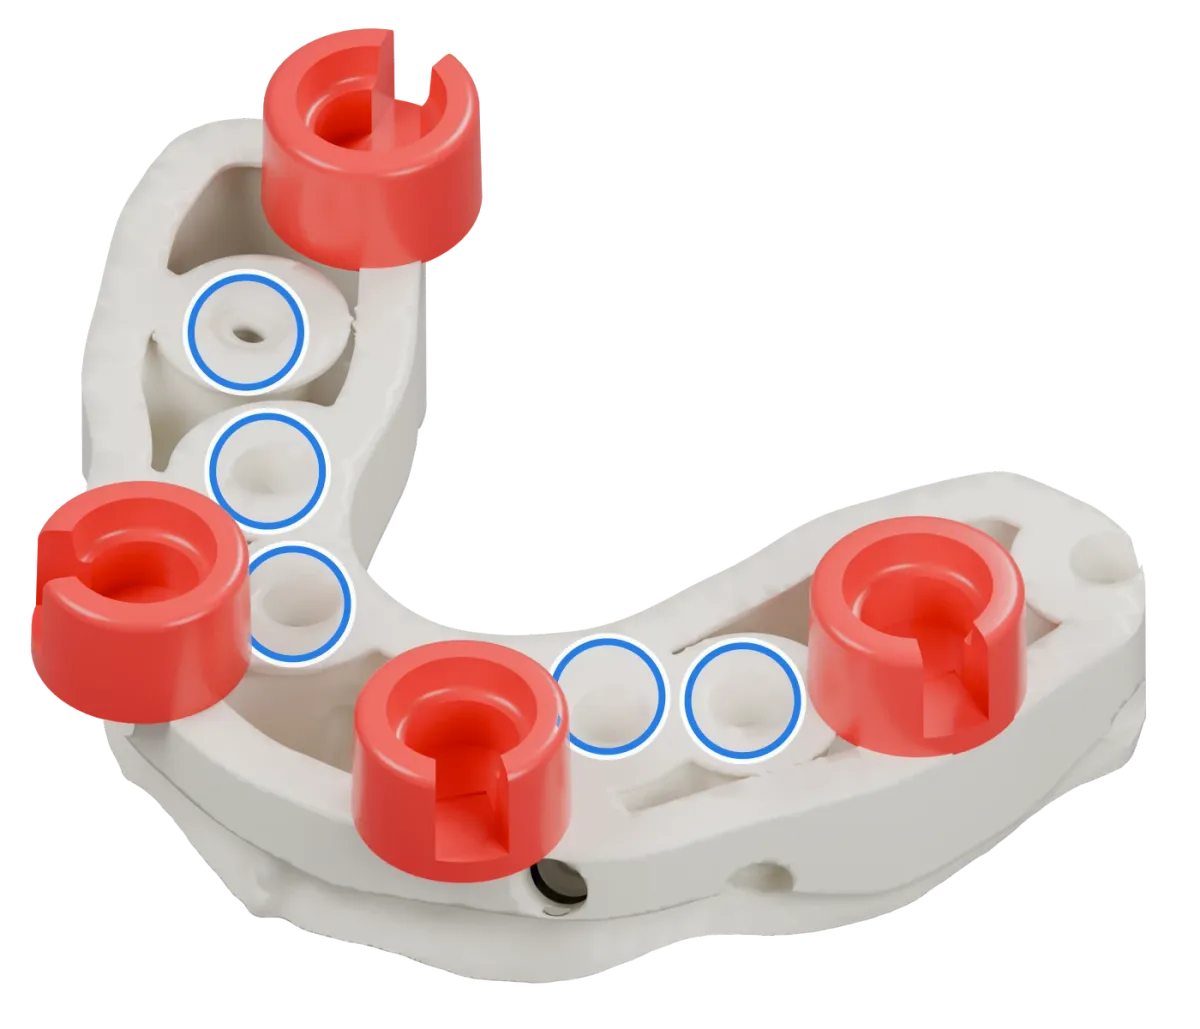
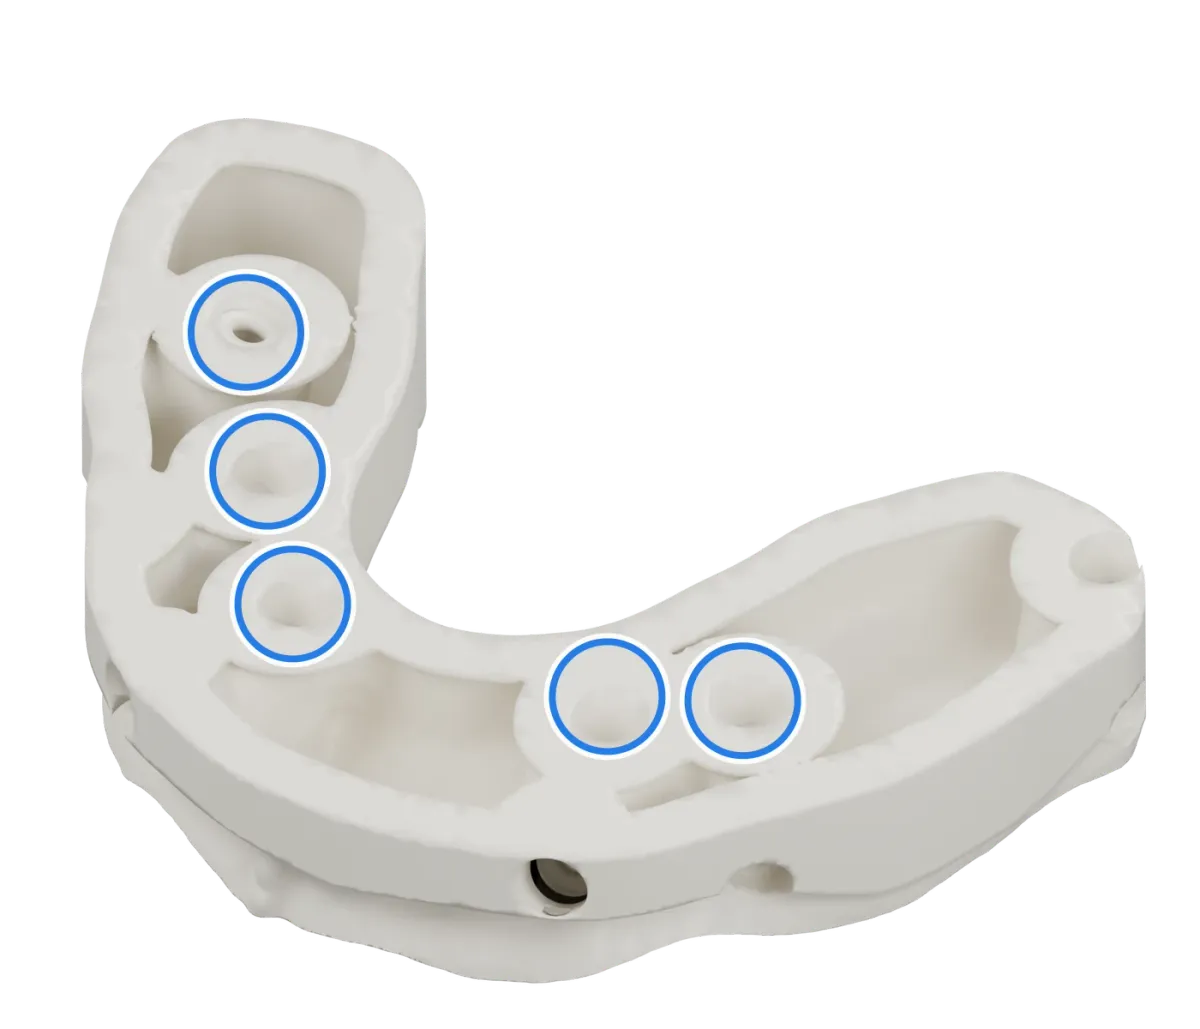
    Rendering of a model on implants seen from the base, with blue rings around its five implant analogs.
    Start from the caseA model on implants, seen from the base. The blue rings mark its implant analogs. The four sockets of a combination have to leave them free.
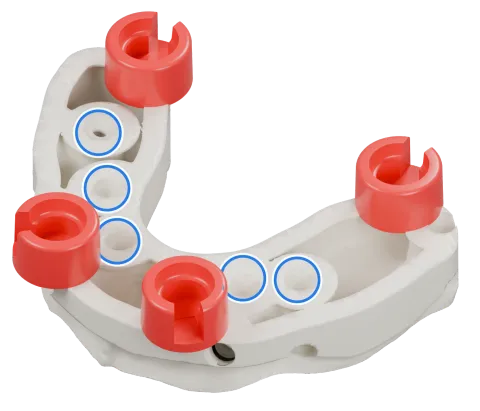
    • Rendering of the same model on implants with the four red DACOS sockets placed as DAC4-1, positions 1 · 3 · 5 · 7, and blue rings on the implant analogs.
      DAC4-11 · 3 · 5 · 7Inner diamond
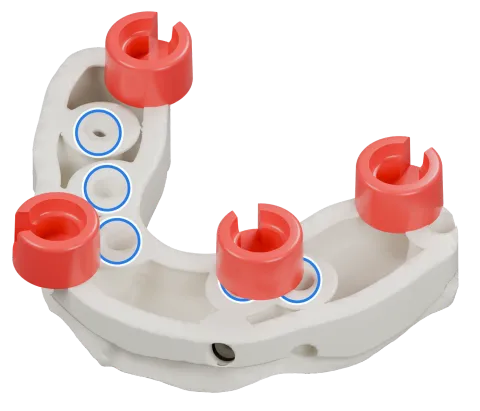
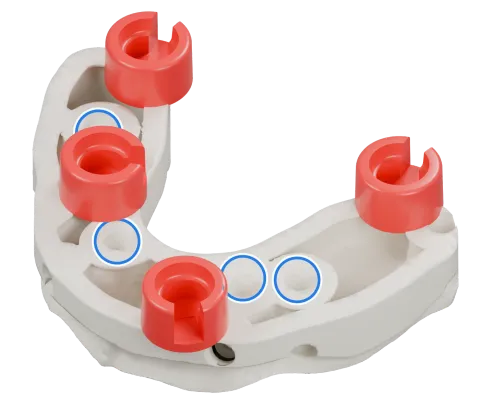
    • Rendering of the same model on implants with the four red DACOS sockets placed as DAC4-2, positions 1 · 3 · 5 · 8, and blue rings on the implant analogs.
      DAC4-21 · 3 · 5 · 8Inner trio + outer 8, slightly asymmetric
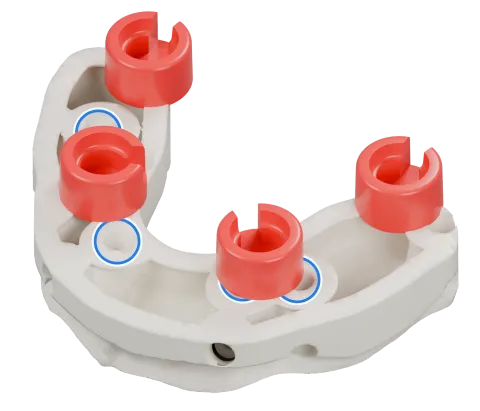
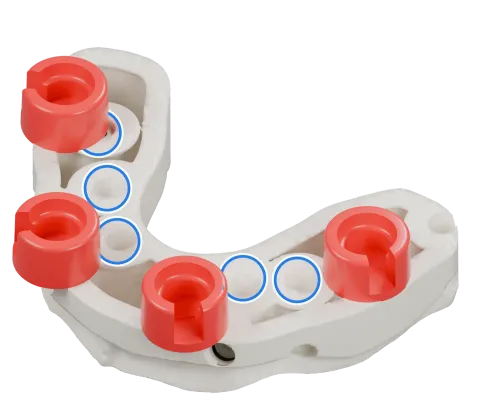
    • Rendering of the same model on implants with the four red DACOS sockets placed as DAC4-3, positions 1 · 3 · 6 · 8, and blue rings on the implant analogs.
      DAC4-31 · 3 · 6 · 8Cross-diagonal X-pattern
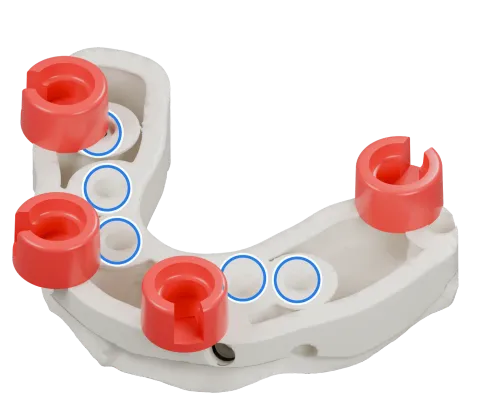
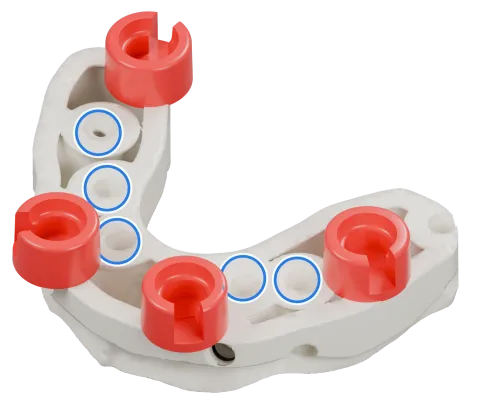
    • Rendering of the same model on implants with the four red DACOS sockets placed as DAC4-4, positions 1 · 4 · 5 · 7, and blue rings on the implant analogs.
      DAC4-41 · 4 · 5 · 7Wide rectangle, anterior clear
    • Rendering of the same model on implants with the four red DACOS sockets placed as DAC4-5, positions 1 · 4 · 5 · 8, and blue rings on the implant analogs.
      DAC4-5Standard1 · 4 · 5 · 8Classic wide rectangle
    • Rendering of the same model on implants with the four red DACOS sockets placed as DAC4-6, positions 1 · 4 · 6 · 8, and blue rings on the implant analogs.
      DAC4-61 · 4 · 6 · 8Inner diamond reverse
    • Rendering of the same model on implants with the four red DACOS sockets placed as DAC4-7, positions 2 · 4 · 5 · 7, and blue rings on the implant analogs.
      DAC4-72 · 4 · 5 · 7Offset rectangle
    • Rendering of the same model on implants with the four red DACOS sockets placed as DAC4-8, positions 2 · 4 · 5 · 8, and blue rings on the implant analogs.
      DAC4-82 · 4 · 5 · 8Offset rectangle, right-bias
    • Rendering of the same model on implants with the four red DACOS sockets placed as DAC4-9, positions 2 · 4 · 6 · 8, and blue rings on the implant analogs.
      DAC4-92 · 4 · 6 · 8Offset cross, X-pattern, right-bias

    Renderings of one model, not photos of printed models. The rings are a reading aid.

    Patent Pending

    The Frame, for half arches and quadrants.

    For half arch and quadrant cases, the Frame gives the model a stabilized base.

    What sits on the Frame
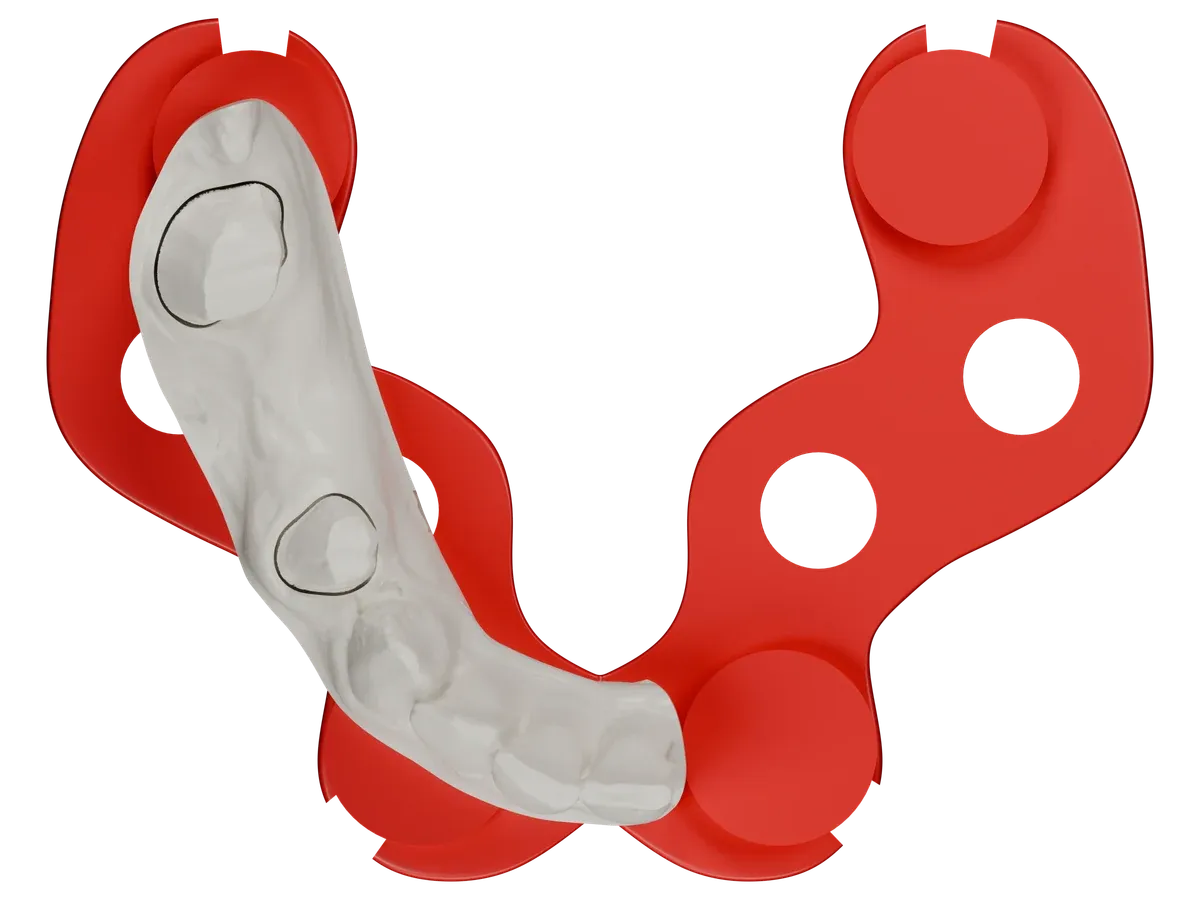
    CAD rendering of the red DACOS Frame for a lower model, seen from above: four sockets joined by a reinforcement bar.
    CAD rendering of a lower half arch crown case on the red DACOS Frame, seen from above.
    CAD rendering of a lower half arch bridge case on the red DACOS Frame, seen from above.
    The Frame alone: four sockets joined by the reinforcement bar.A lower half arch crown case on the Frame.A lower half arch bridge case on the Frame.
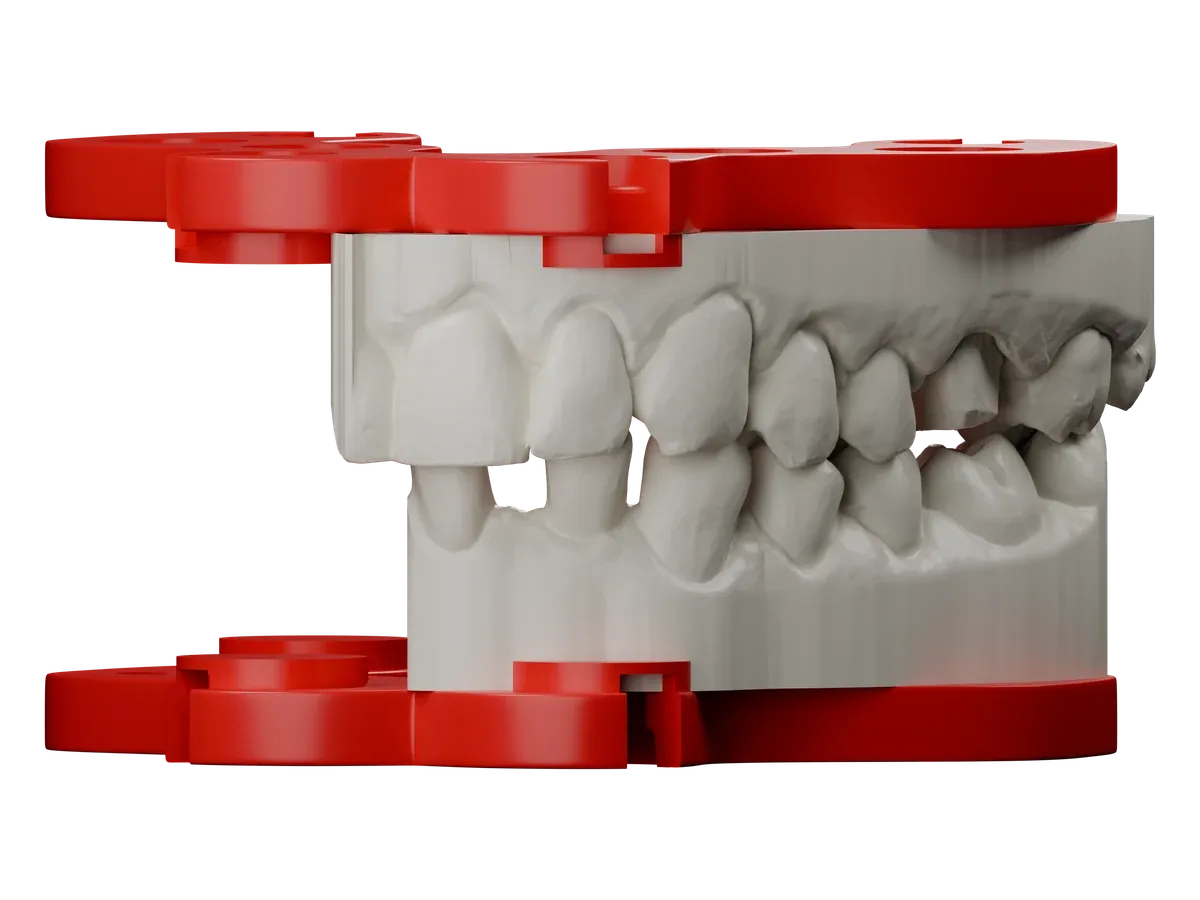
    CAD rendering of an upper and a lower crown case in occlusion, front view slightly angled, each model on its red DACOS Frame.
    Upper and lower in occlusion, each on its own Frame. Front view, slightly angled.

    CAD renderings, not photos of printed parts. The model bases are adapted for the illustration.

    Print and seat

    Magnets last, seating step first.

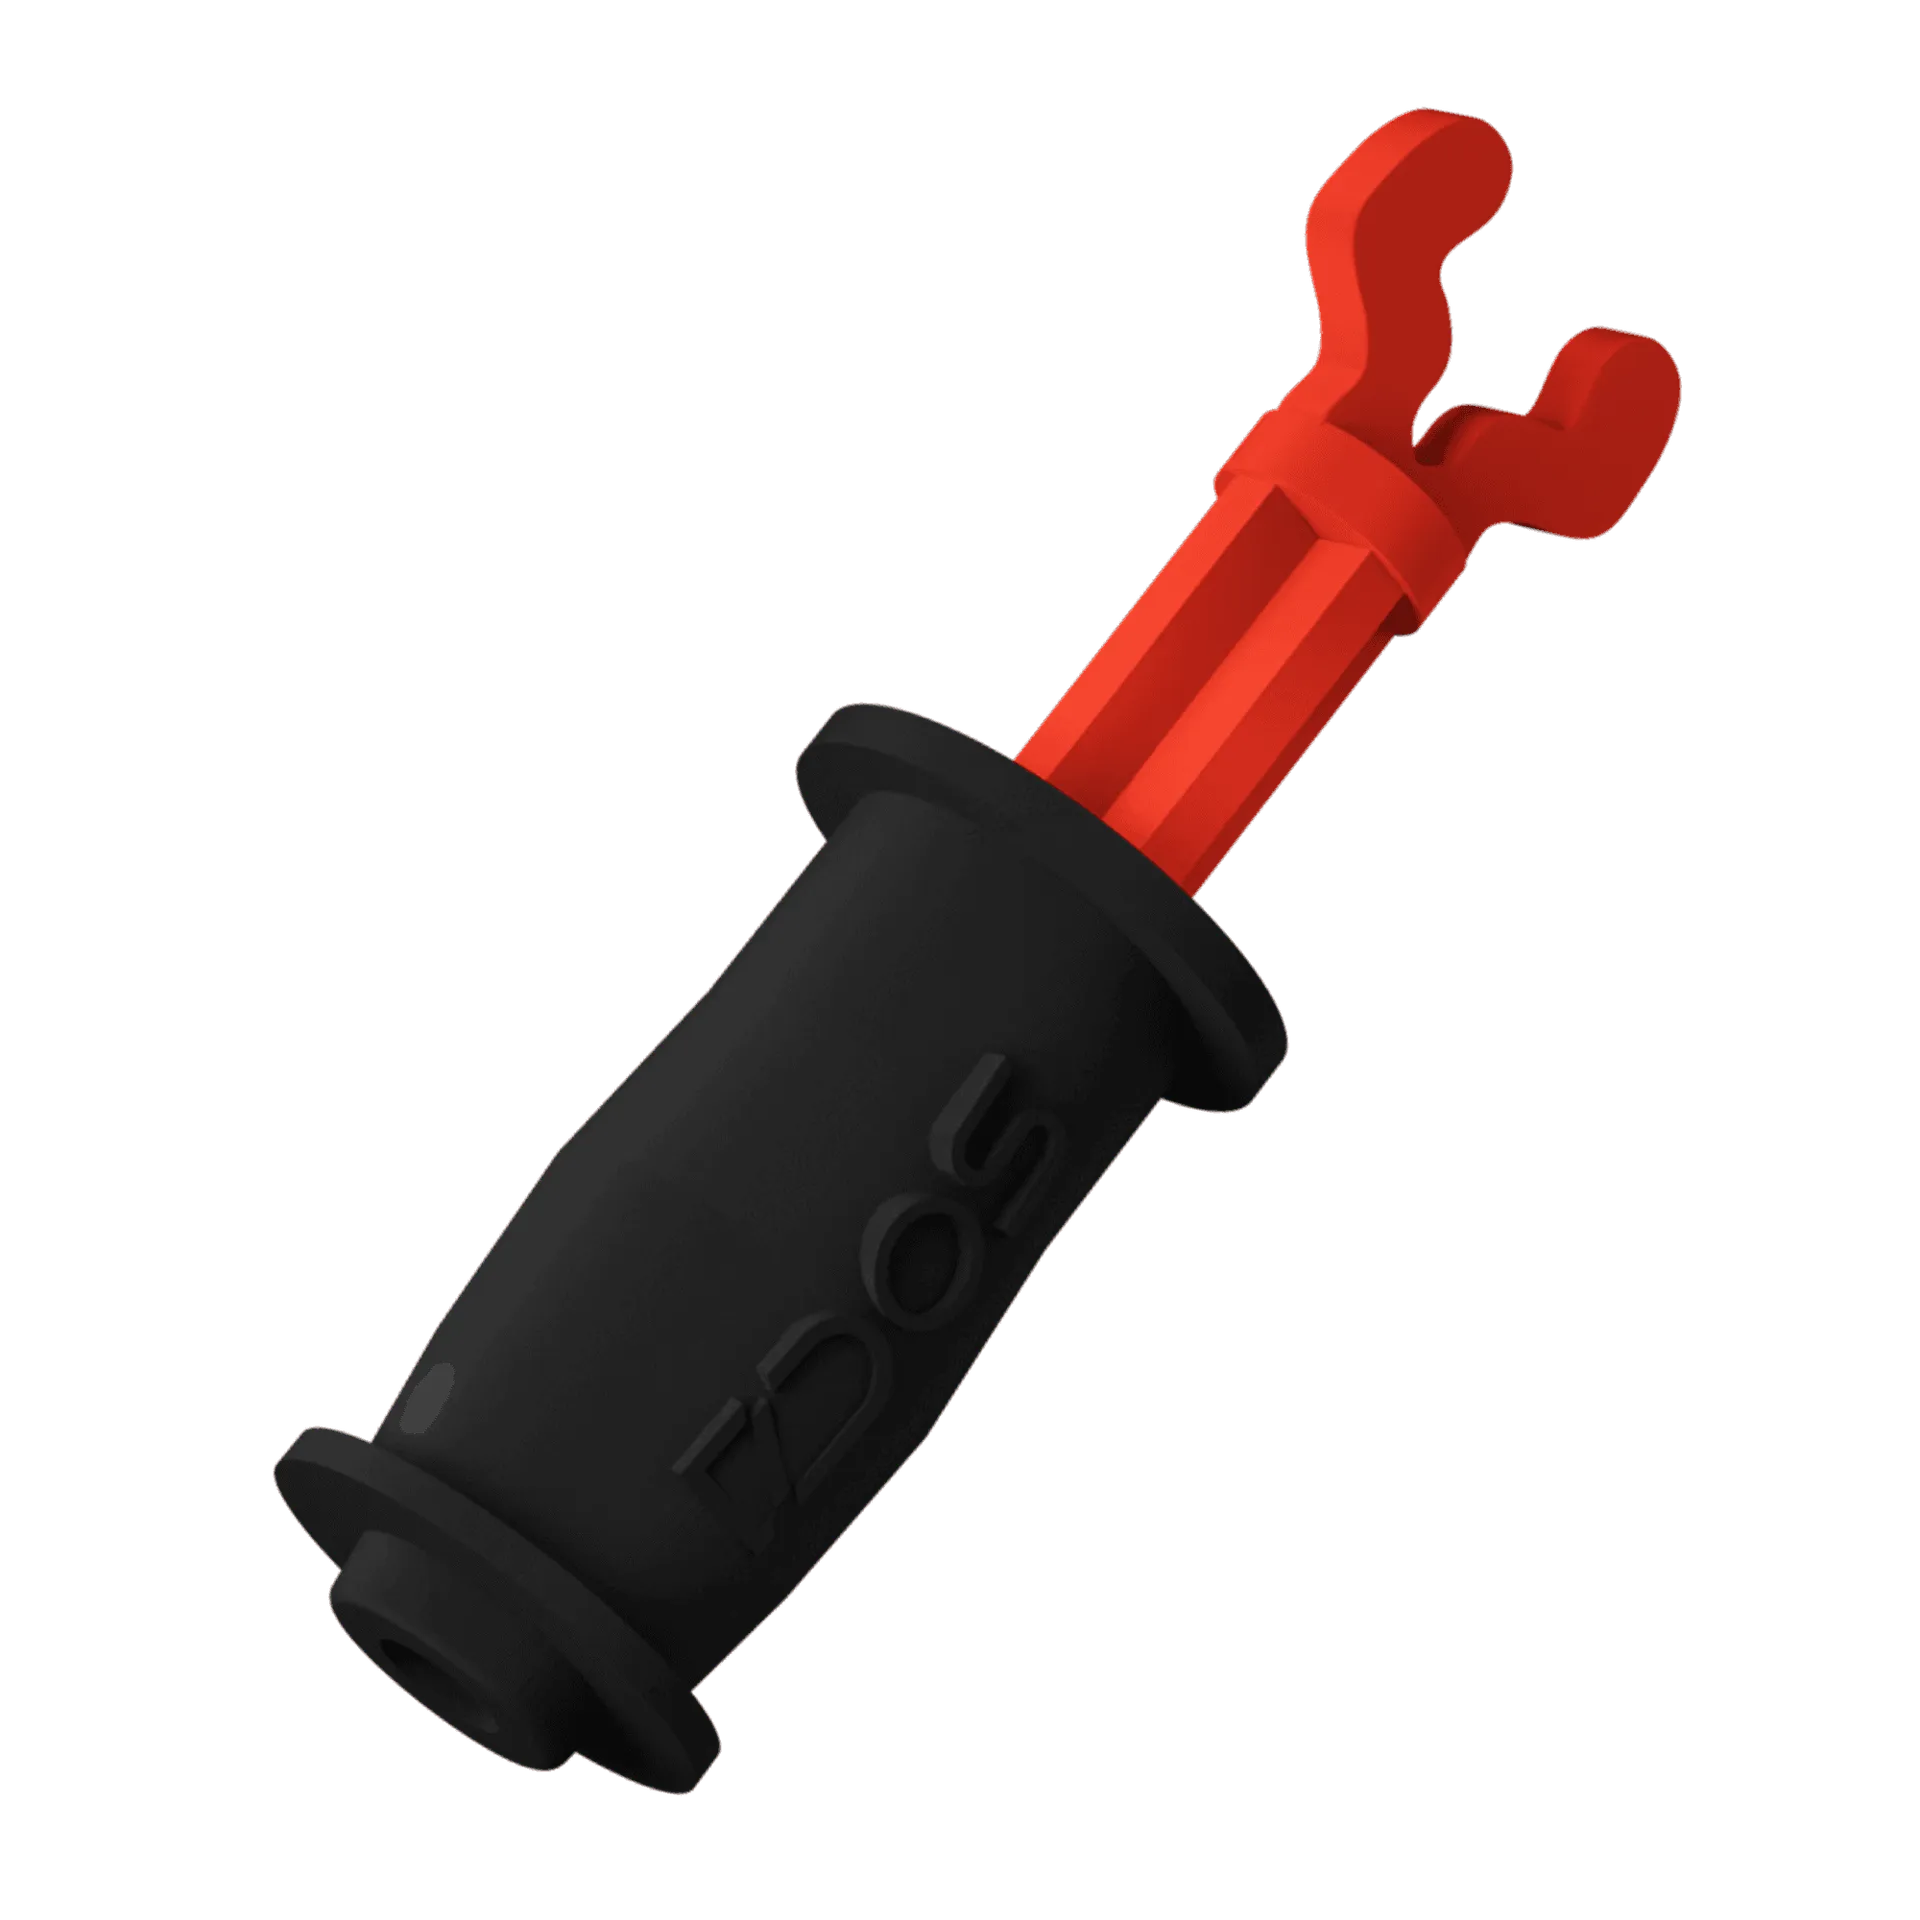
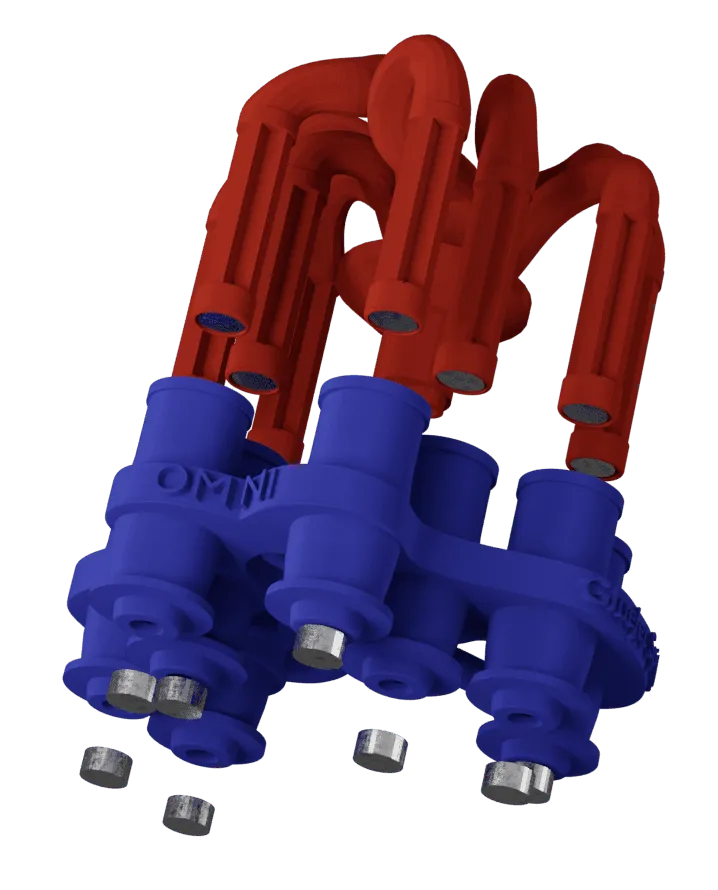
    Print flat on the platform, supports under the base, none on the seating step, with the printer, resin and post-curing of your calibrator. After post-curing the magnets go in with the Omni GlueJet™ or the Omni GlueJet™ Spider Set, which hold them at the right polarity. The magnet sits at the bottom of its housing and never touches the magnet of the plate: the seating step defines the position.

    Omni GlueJet™

    USD 10.00

    Mistakes to avoid

    What breaks the transfer in exocad.

    • Calibrator and attachment library in different offsets.
    • A Plateless model below the minimum height.
    • Editing the height by hand while using the plate library.
    • An old plate library taken for a system fault: build the Plateless model instead.
    • The blue occlusal plane touching the model.
    • A Light model with Ultra attachments, or the reverse.

    Lessons in the hub

    Every step, recorded on exocad.

    1. Install the exocad libraries12 stepsLanguages: ENITES
    2. Introduction: models and heights1:09Languages: ENITES
    3. Light: model and attachments2:13Languages: ENITES
    4. Ultra: 55 mm model0:43Languages: ENITES
    5. Ultra Extended: 40 mm model0:48Languages: ENITES
    6. Frame: half-arch models0:48Languages: ENITES
    7. Print the TrueZero™ calibrator8 stepsLanguages: ENITES

    Available in the hub with your kitOpen the lessons in the hub (opens in a new tab)

    Questions

    Does it work on my exocad version?

    On recent versions both libraries load. On older versions such as Rijeka the attachment library works and the plate library does not: build a Plateless model at the minimum height.

    Do I need the plate library?

    No. The attachment library is the one you need. The plate library sets the height of the model for you.

    Ultra or Ultra Extended?

    Ultra builds a 55 mm model. With analogs on Ultra, build at 40 mm and select Ultra Extended: the attachments are longer and the magnets stay at the Ultra height.

    Why is the model cut where I placed no attachment?

    The Boolean subtraction lets the model sit on the positive part of the plate, which carries magnets in every position. With Ultra, a 40 mm model with Ultra Extended keeps the seat.

    Can I move a single attachment?

    No. Only the whole combination moves, in XY, so the occlusal plane does not tilt. If an attachment meets an analog, change combination.

    Removable dies?

    One or two on the model work well. For a full arch, cut-out dies printed apart keep the work cleaner.

    Which offset do I download?

    The one your fitting test selected. The hub gives you every offset of your tier, so you can change it if your printer or resin changes.

    English or Italian library?

    Both exist. Choose the language of your Model Creator labels.

    New to DACOS Omni

    Choose your kit.

    Your articulator decides the kit, your CAD decides the library, your cases decide the height.

    Find your kit

    Already have your kit

    Open the hub.

    Libraries, calibrator files and lessons for your tier.

    Go to the hub(opens in a new tab)

    exocad, DentalCAD, 3Shape, Dental System and Blender for Dental are trademarks of their respective owners.

    Your cart

    Find your kit