Clinical Workflow
DACOS Omni Setup — From Unboxing to First Model in 30 Minutes
Complete visual step-by-step: install plates, print calibrator, calibrate, design in CAD, place magnets, mount model.

Dental Technician & Inventor

You've opened the box. Two plates, a set of magnets, a placement tool, and access to the CAD libraries. Thirty minutes from now you'll have your first model docked on a calibrated articulator and every case after that takes five.
Here's the whole protocol, start to finish.
Step 1 — Install the plates
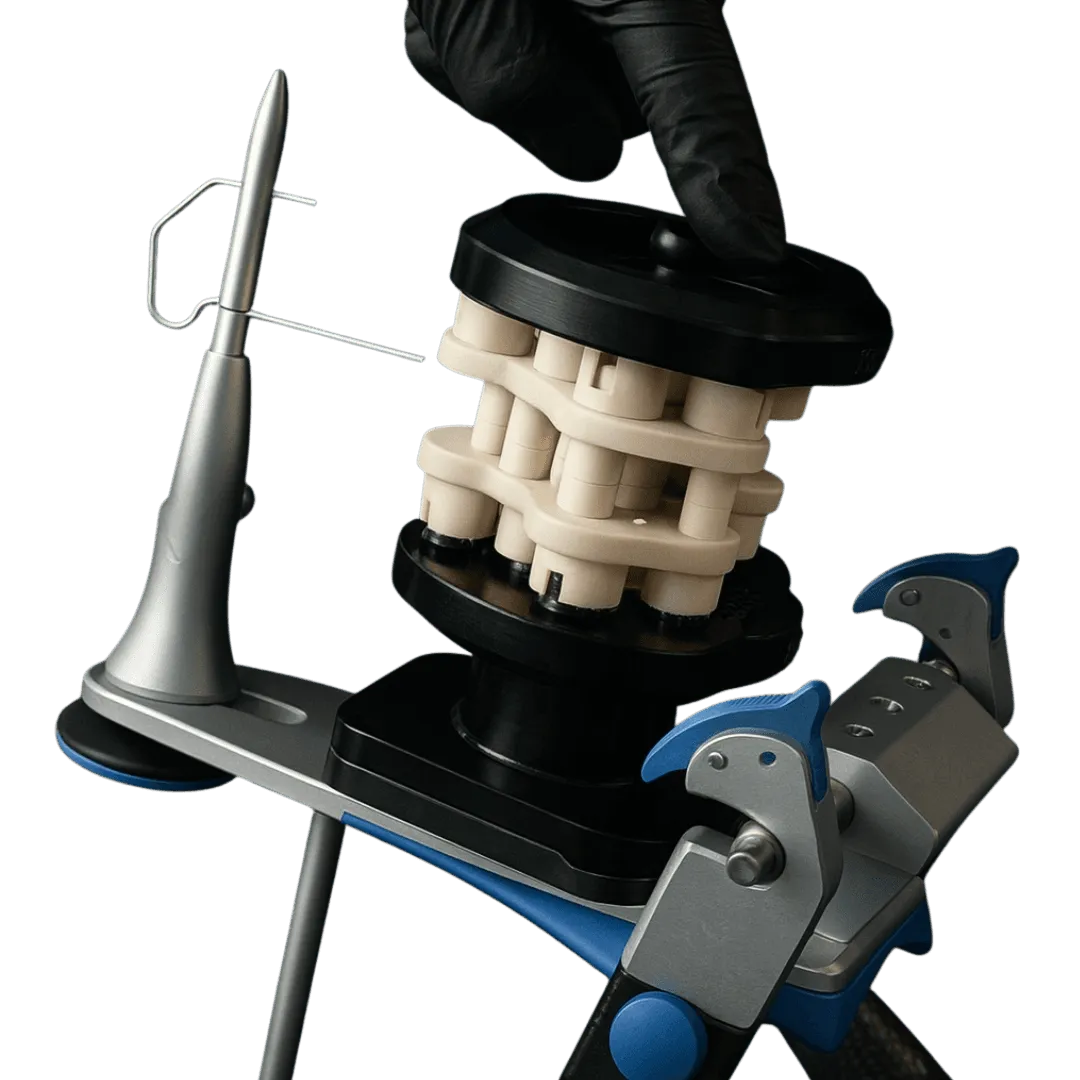
Snap the upper and lower plates onto your articulator's mounting flanges — magnetic pull holds them, or embed them in gypsum if your articulator needs it.
Step 2 — Print the calibrator
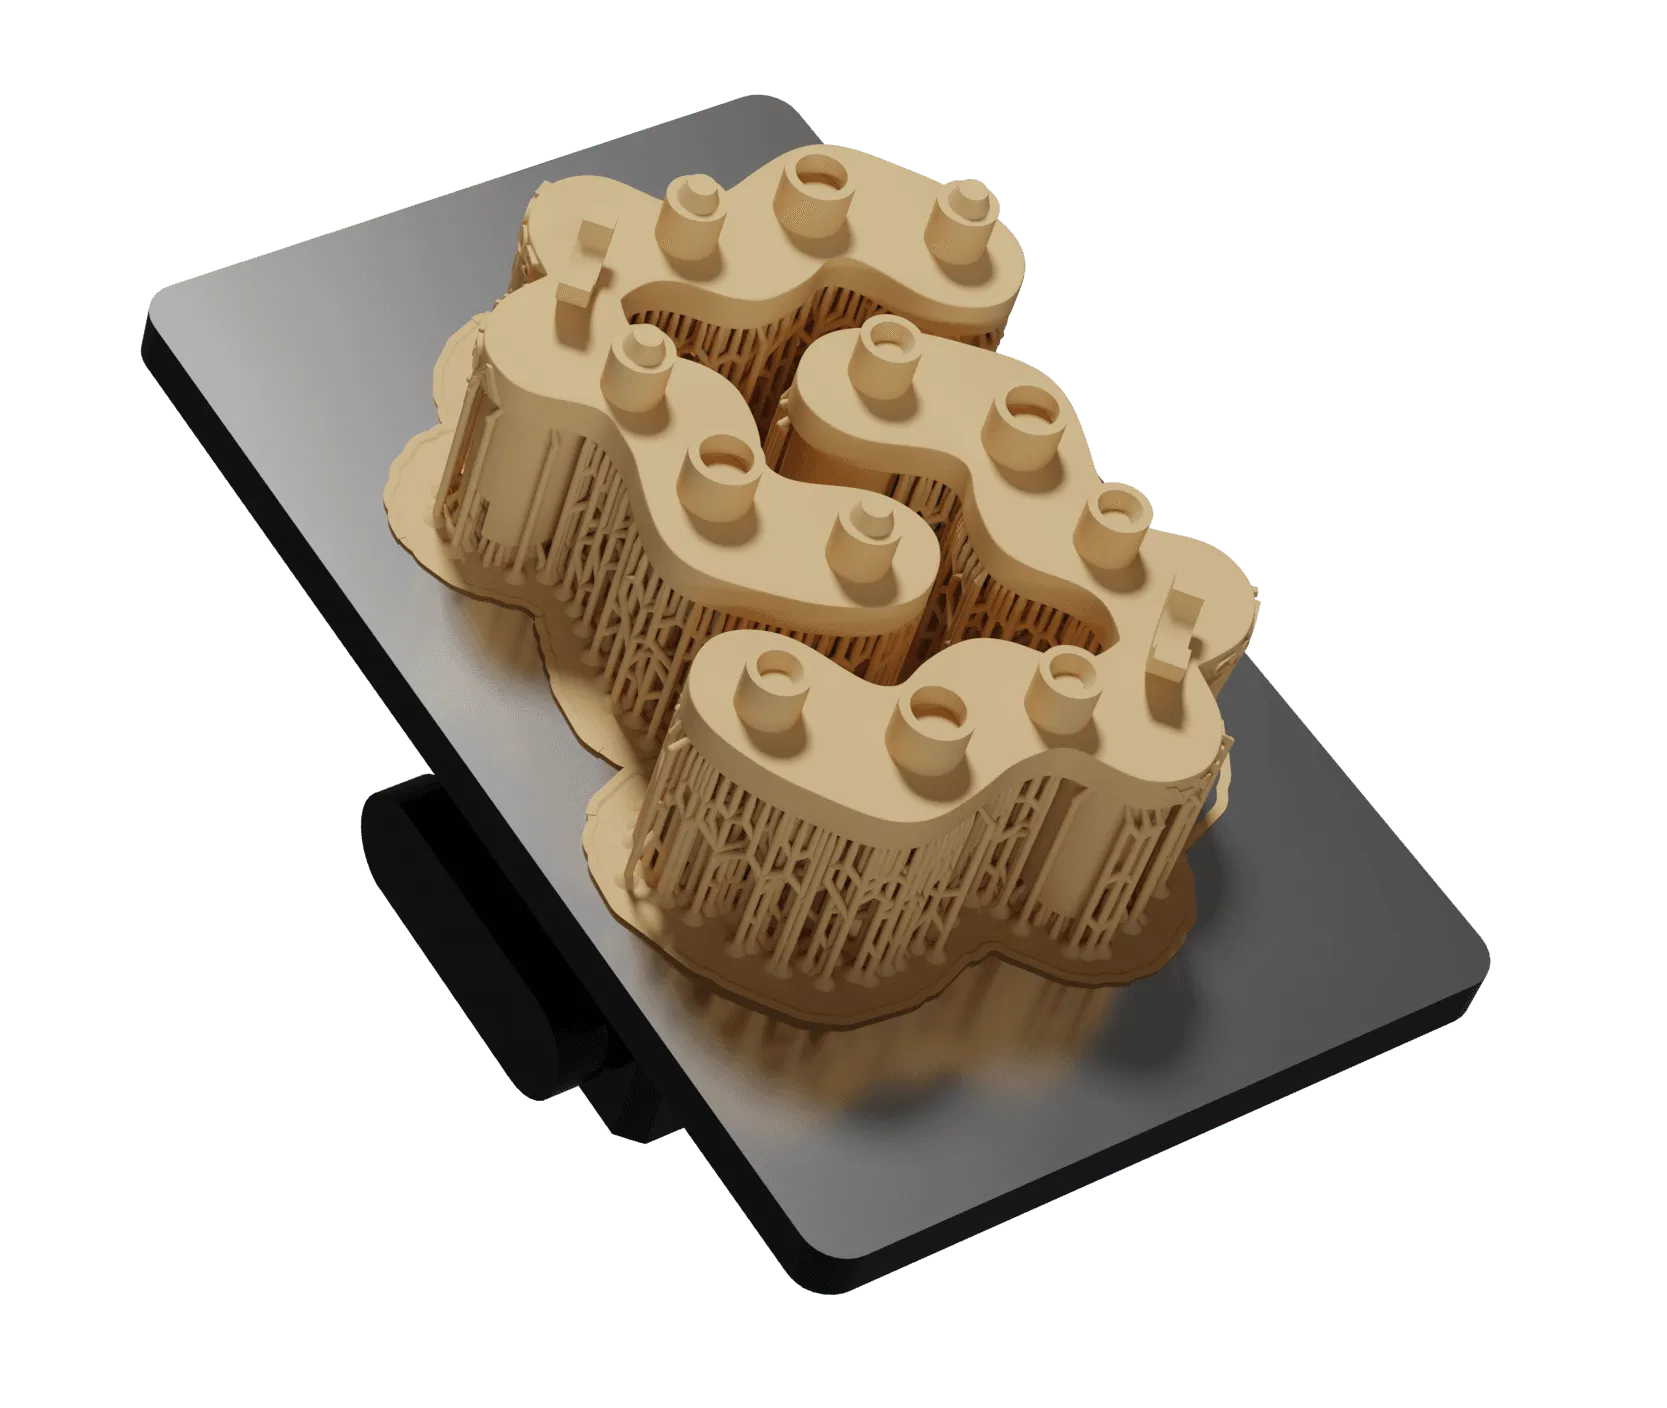
Print both calibrator halves on your printer, with your resin, at your settings — the same ones you'll use for patient models.
Step 3 — Calibrate with TrueZero™
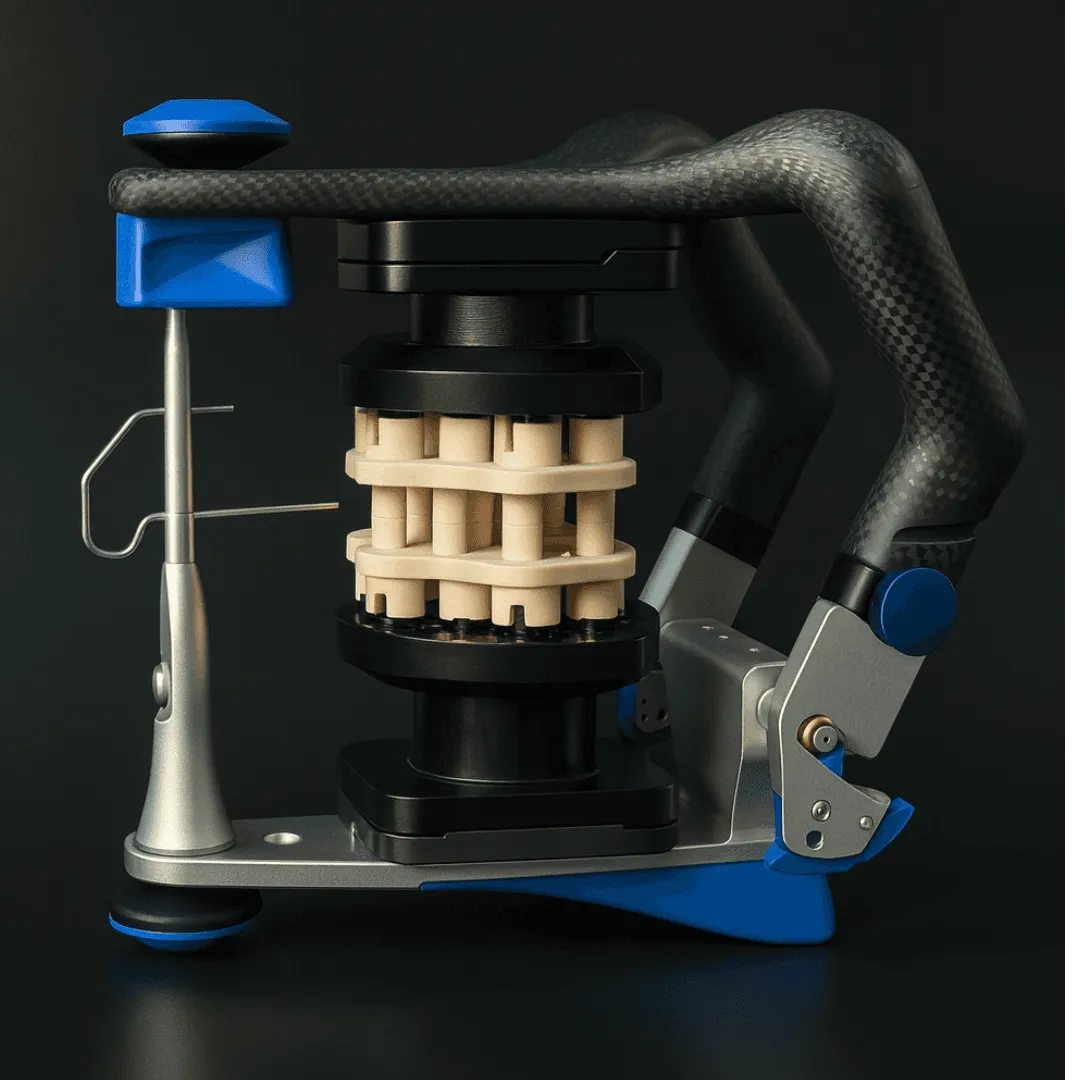
Insert the assembled calibrator between the plates and close the articulator. The ball-in-bowl seat lets the lower plate find its true position — then lock it down.
Your articulator is now calibrated to your own equipment. No factory shims. No guesswork.
Step 4 — Configure in CAD
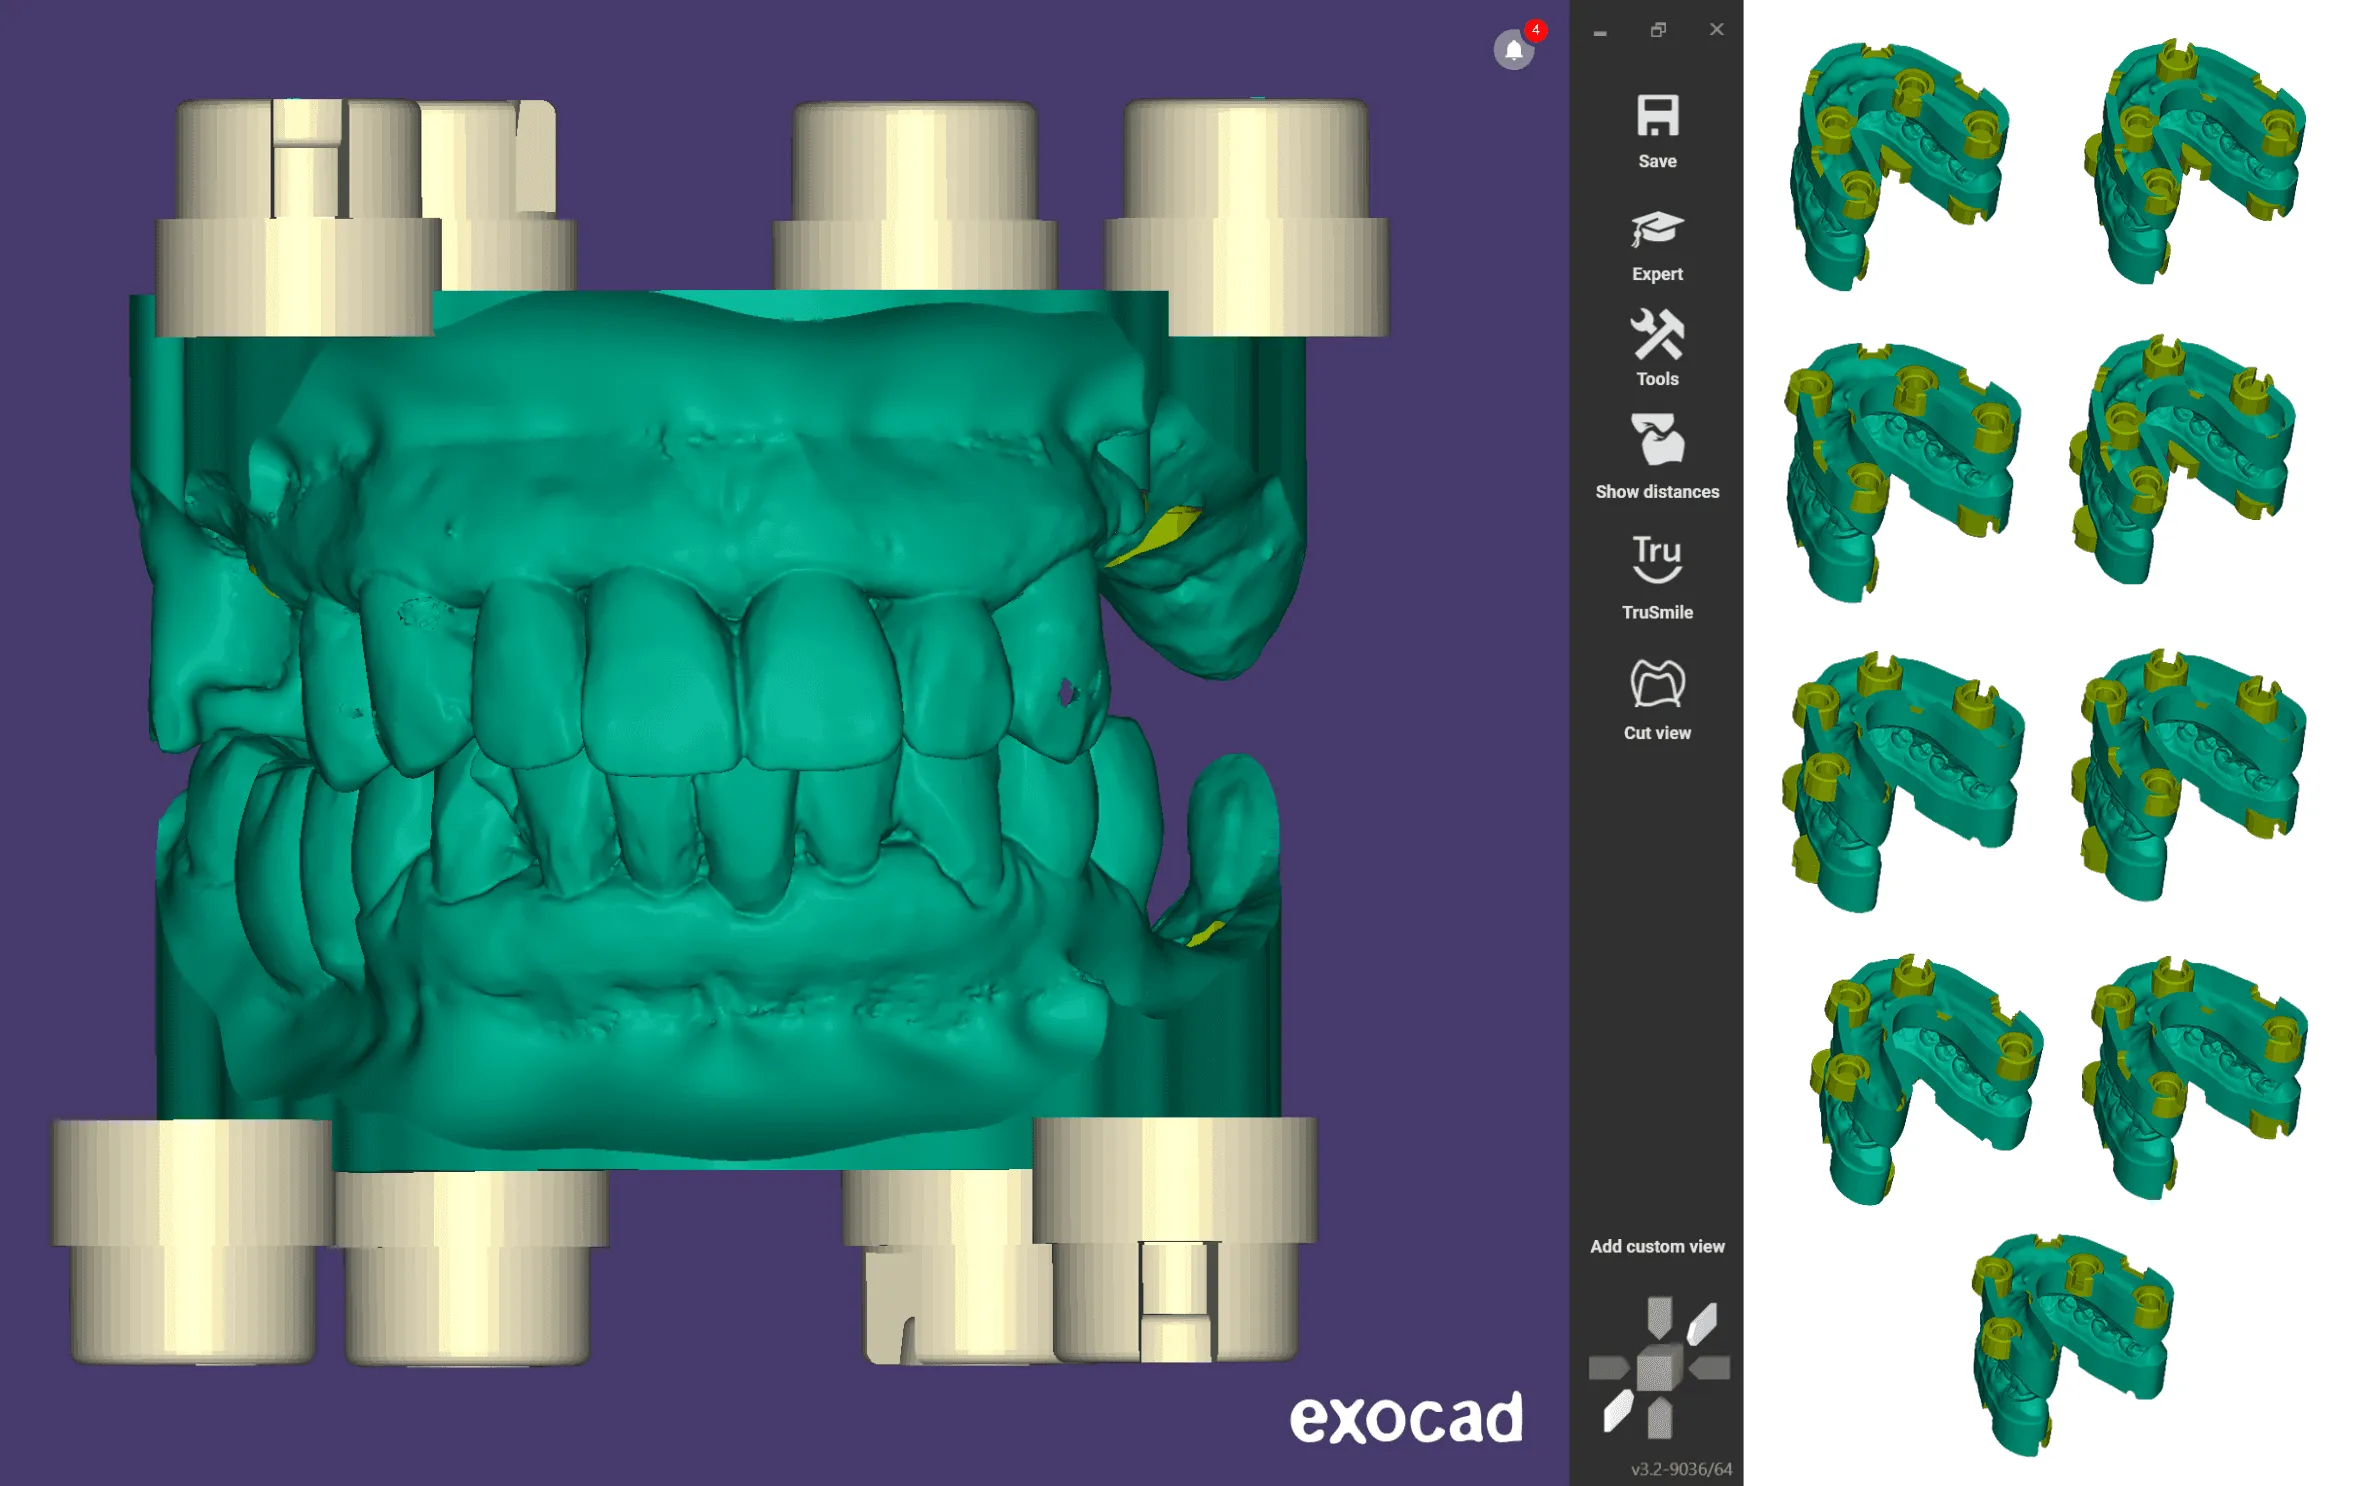
Open the DACOS library inside exocad, 3Shape, or Blender for Dental and load your model. Select the DockingMatrix™ configuration that clears your dies and implant analogs — nine combinations, so there's always one that fits.
Step 5 — Print flat
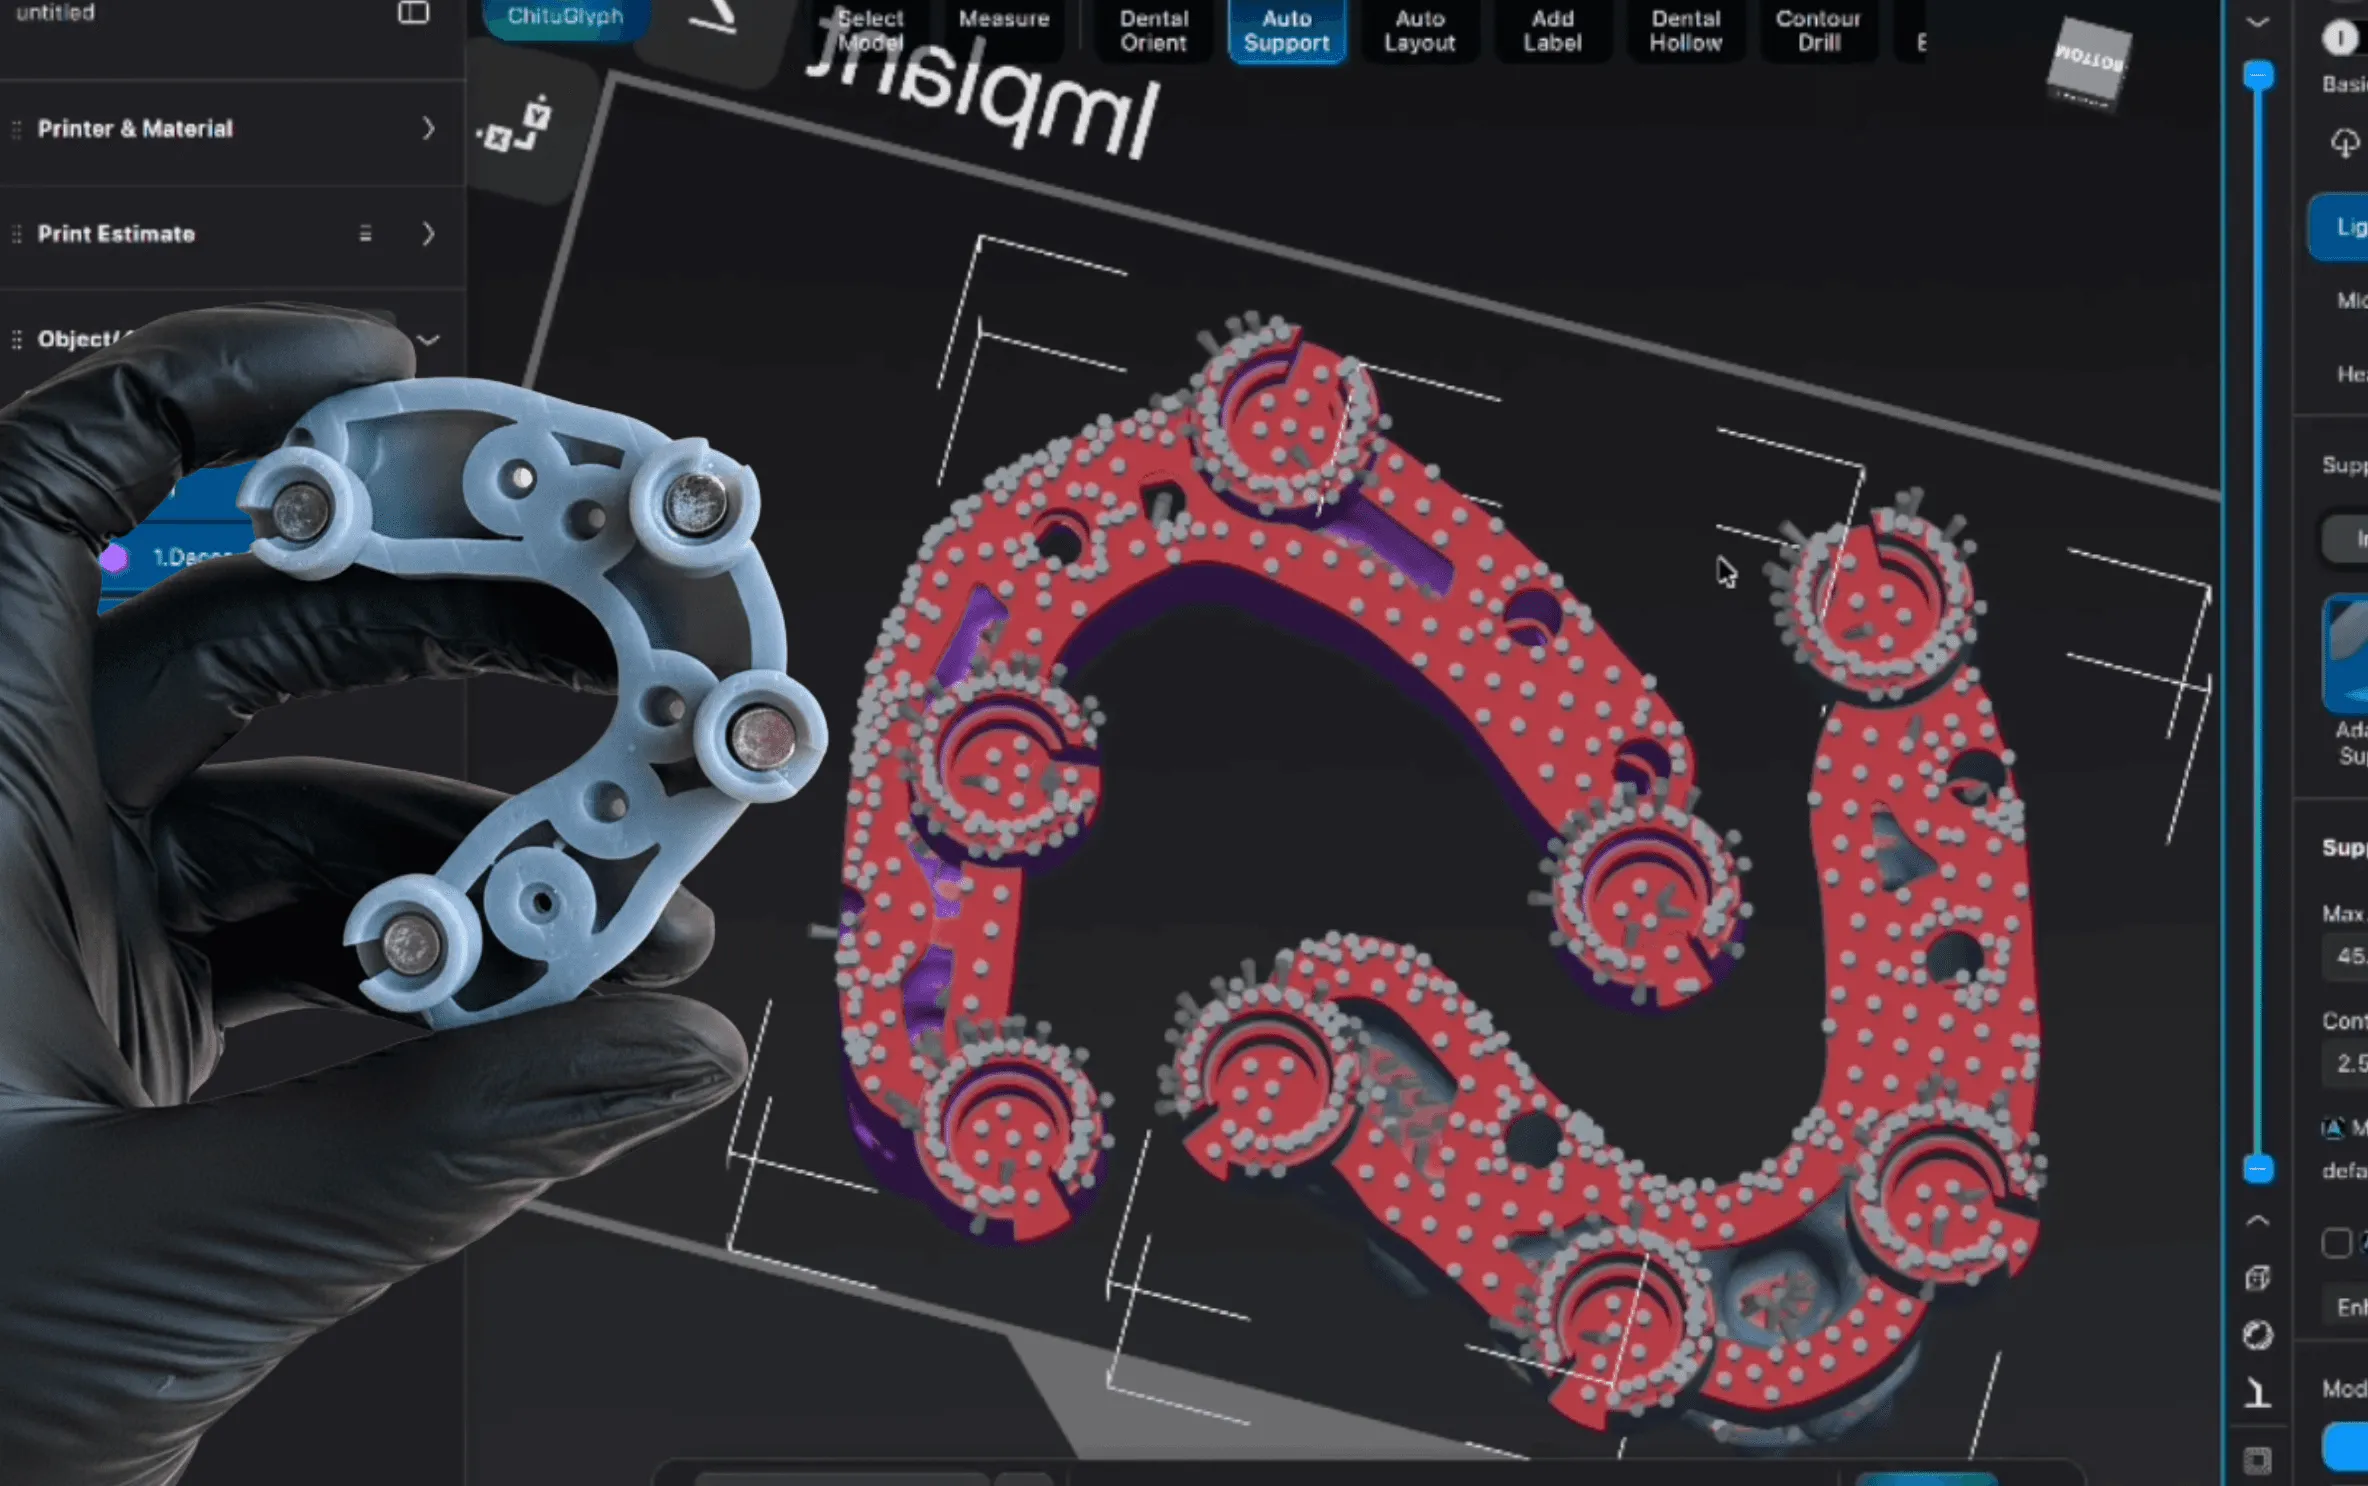
ShieldBase™ geometry prints support-free and horizontal — no 45° tilt, no compromised occlusal surfaces, more models per build.
Step 6 — Place the magnets
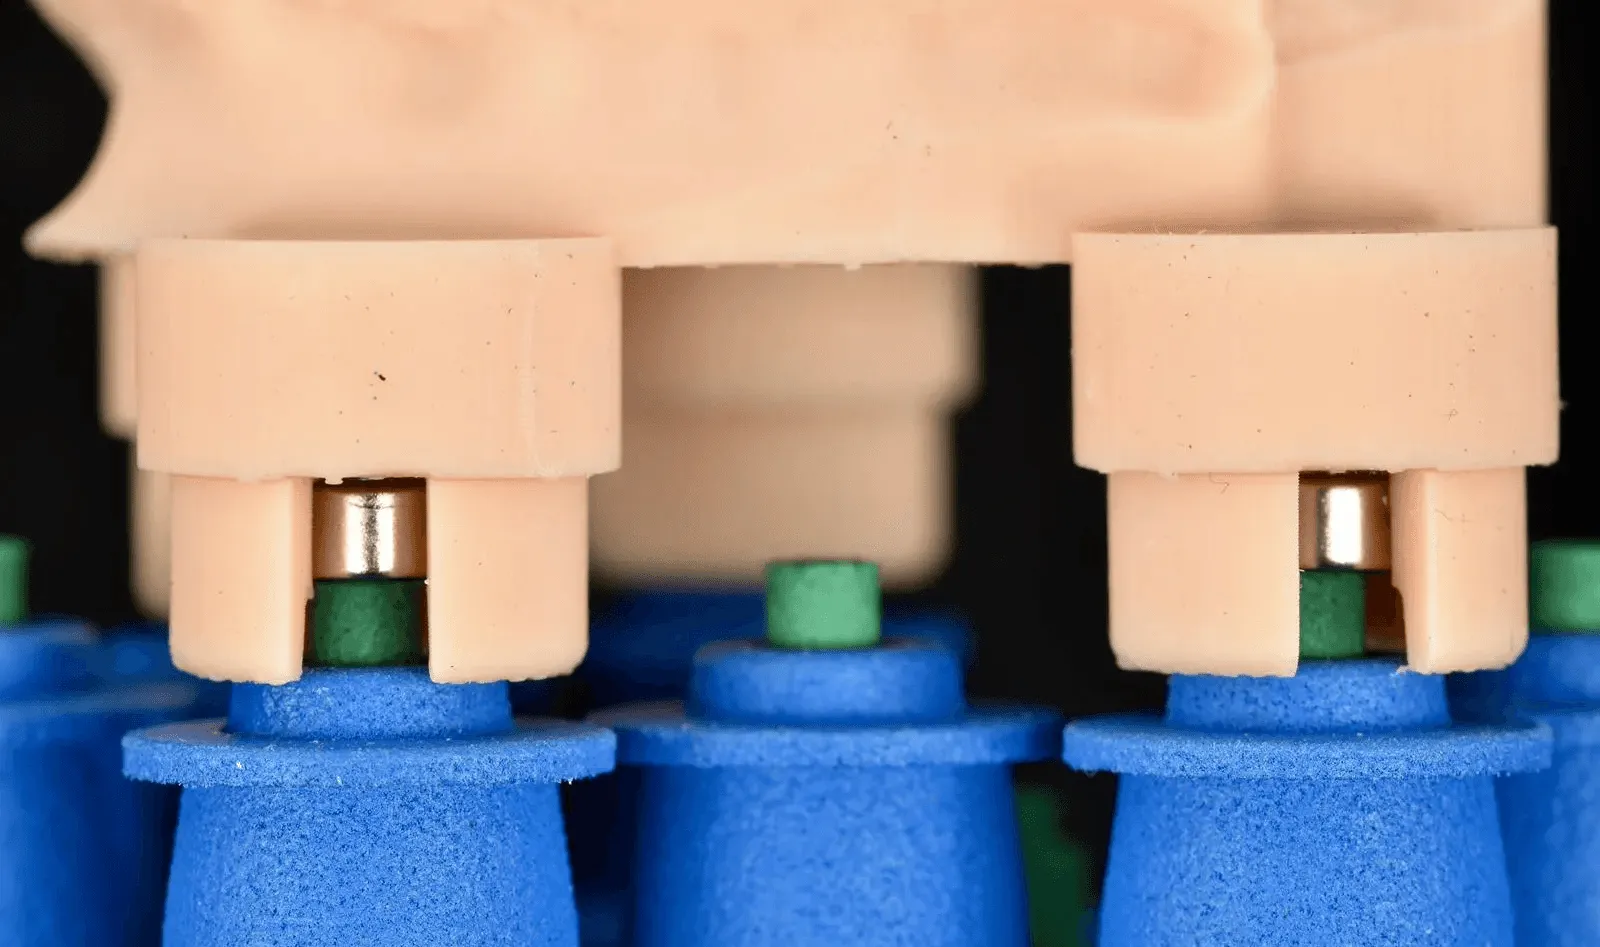
Dispense adhesive into the blind seat, seat the GluJet tool on the rim, and withdraw the plunger — the magnet drops into place at the correct depth and polarity.
Cure. Repeat for each seat. Done in under a minute per model.
Contribution image: Simone Fedi - Dental Technician, Italy
Step 7 — Dock the model
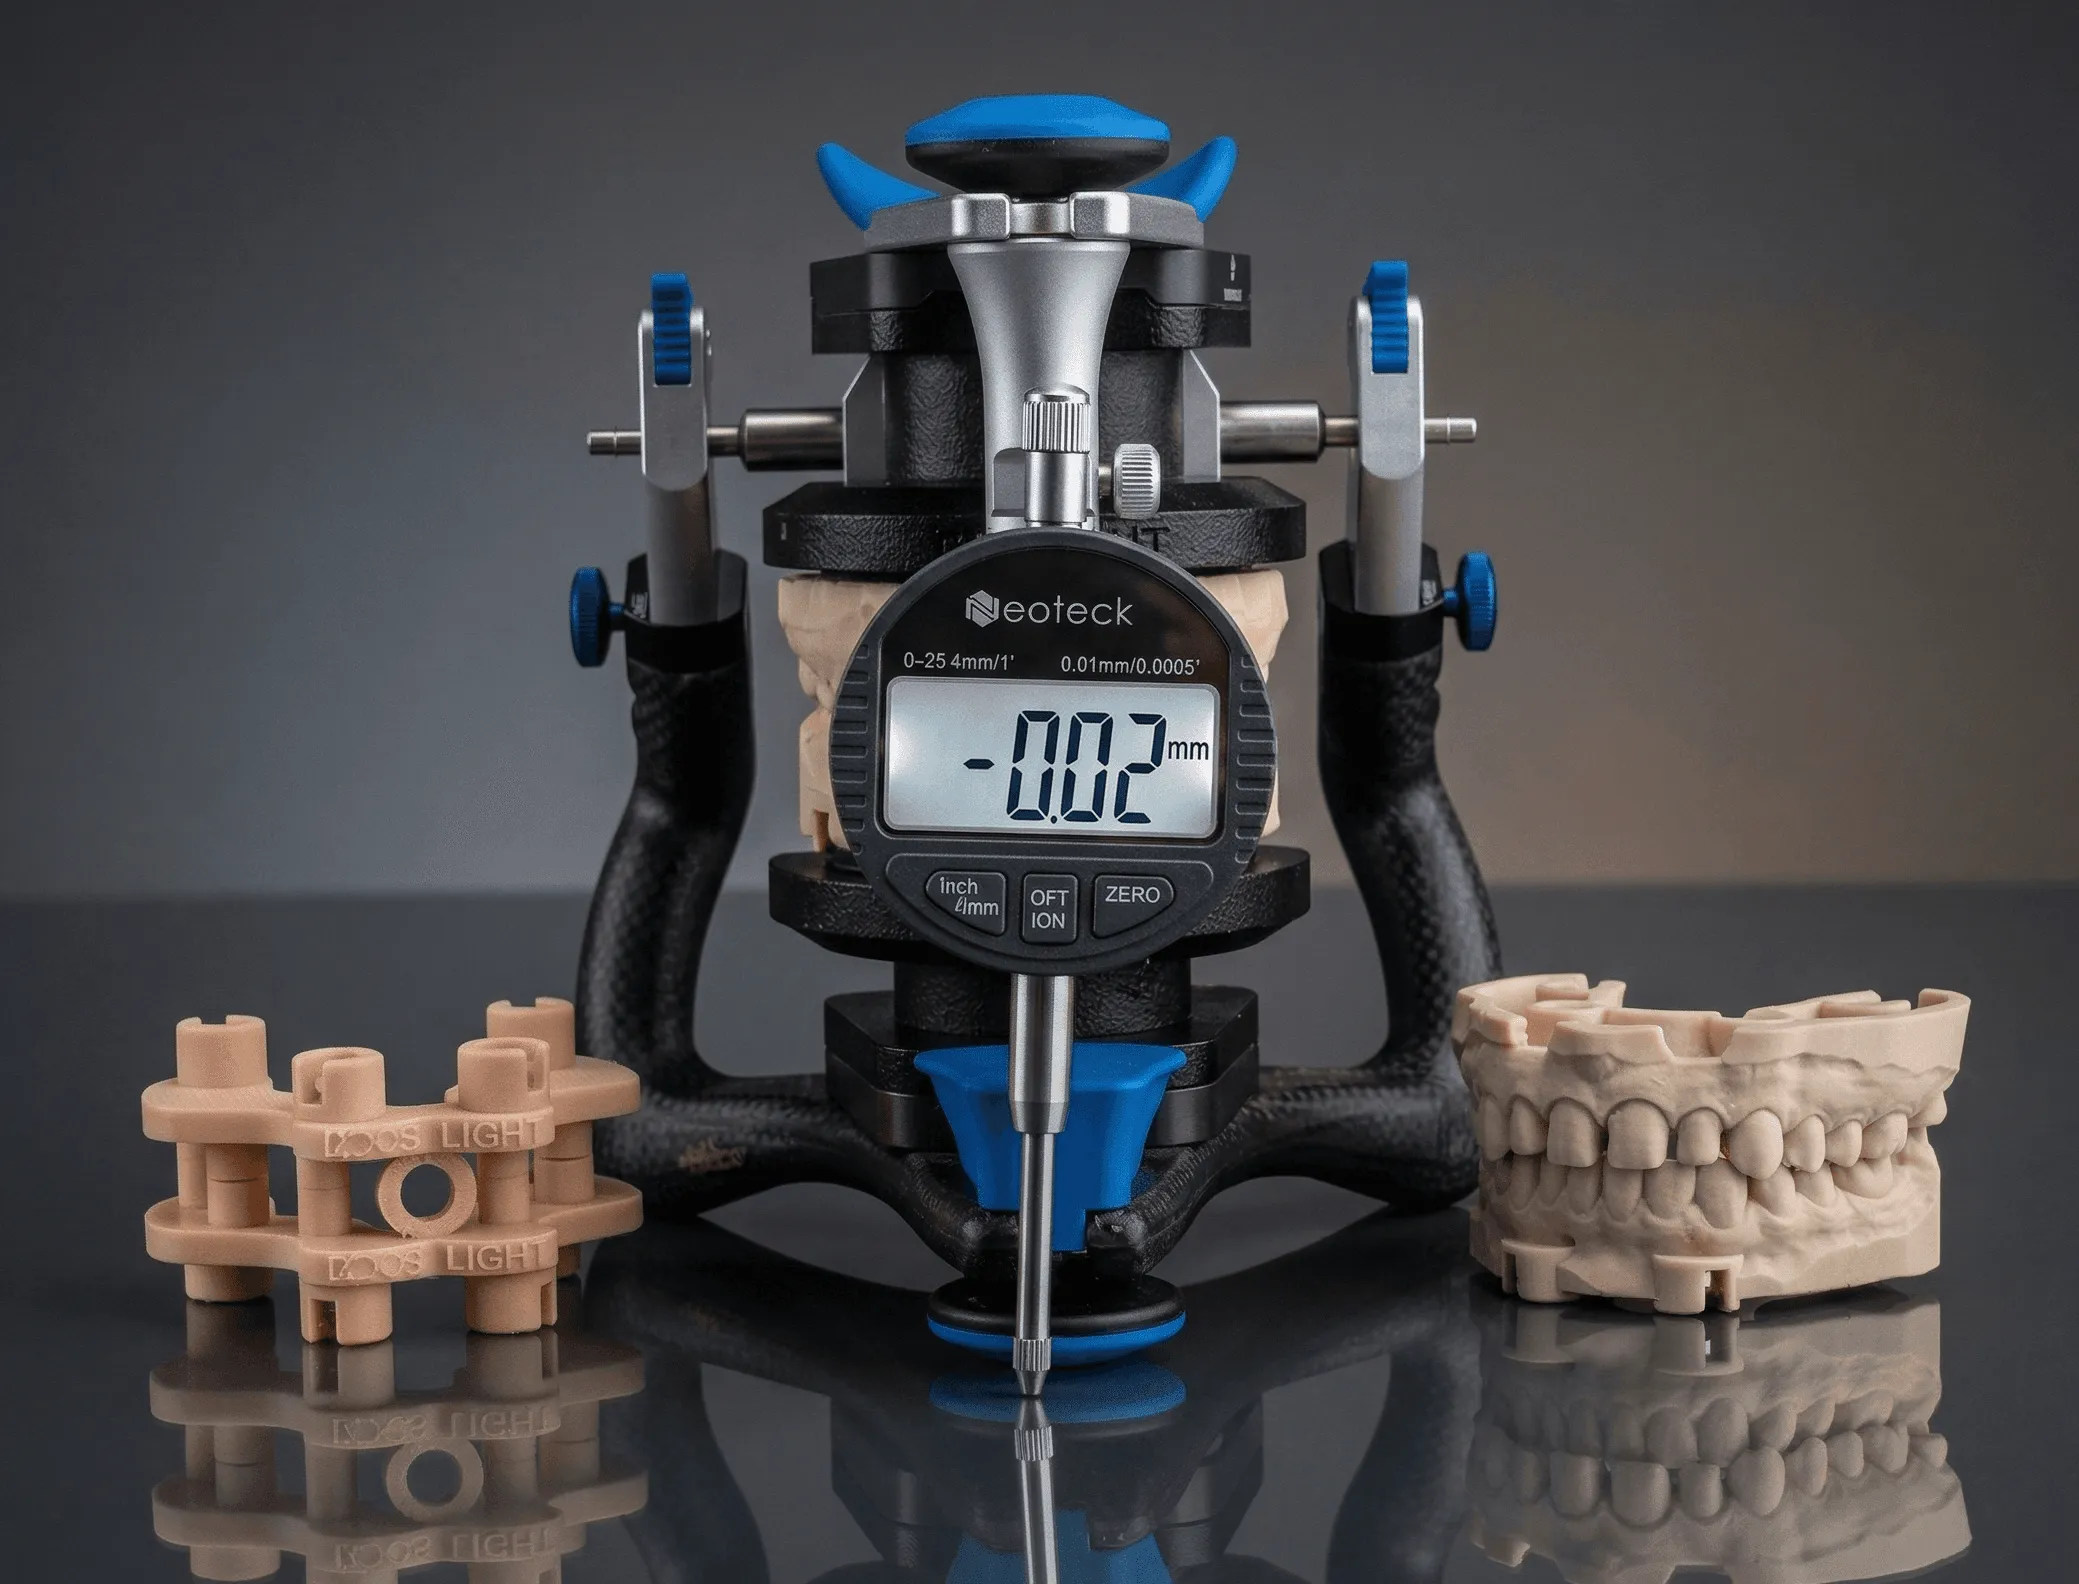
Lower the model onto the platform — the magnets pull it into position, the pin returns to zero, and the contacts you designed are the contacts you're looking at.
That's the protocol
From sealed box to first mounted model: thirty minutes, most of it print time. Every case after that: five minutes.
What you've actually built isn't a faster mounting workflow — it's a transfer step that's calibrated to your own printer, your own resin, your own articulator. The variables that used to make you wonder why don't the contacts match? are now accounted for before you ever mount a patient case.
That's ZeroDrift™. The transfer stops being a question you have to ask.
Want to understand why each component works the way it does?
Deep dive into each component →
The DACOS Omni system is protected by pending international patent applications covering the adapter system, calibration method, attachment geometry, and magnet placement technology.