Clinical Workflow
Full-Arch Implant Case on DACOS Omni — Complete Walkthrough
All-on-4 case from scan to articulator verification. DockingMatrix™ avoids every analog. Zero interference, zero compromise.

Dental Technician & Inventor
The Case
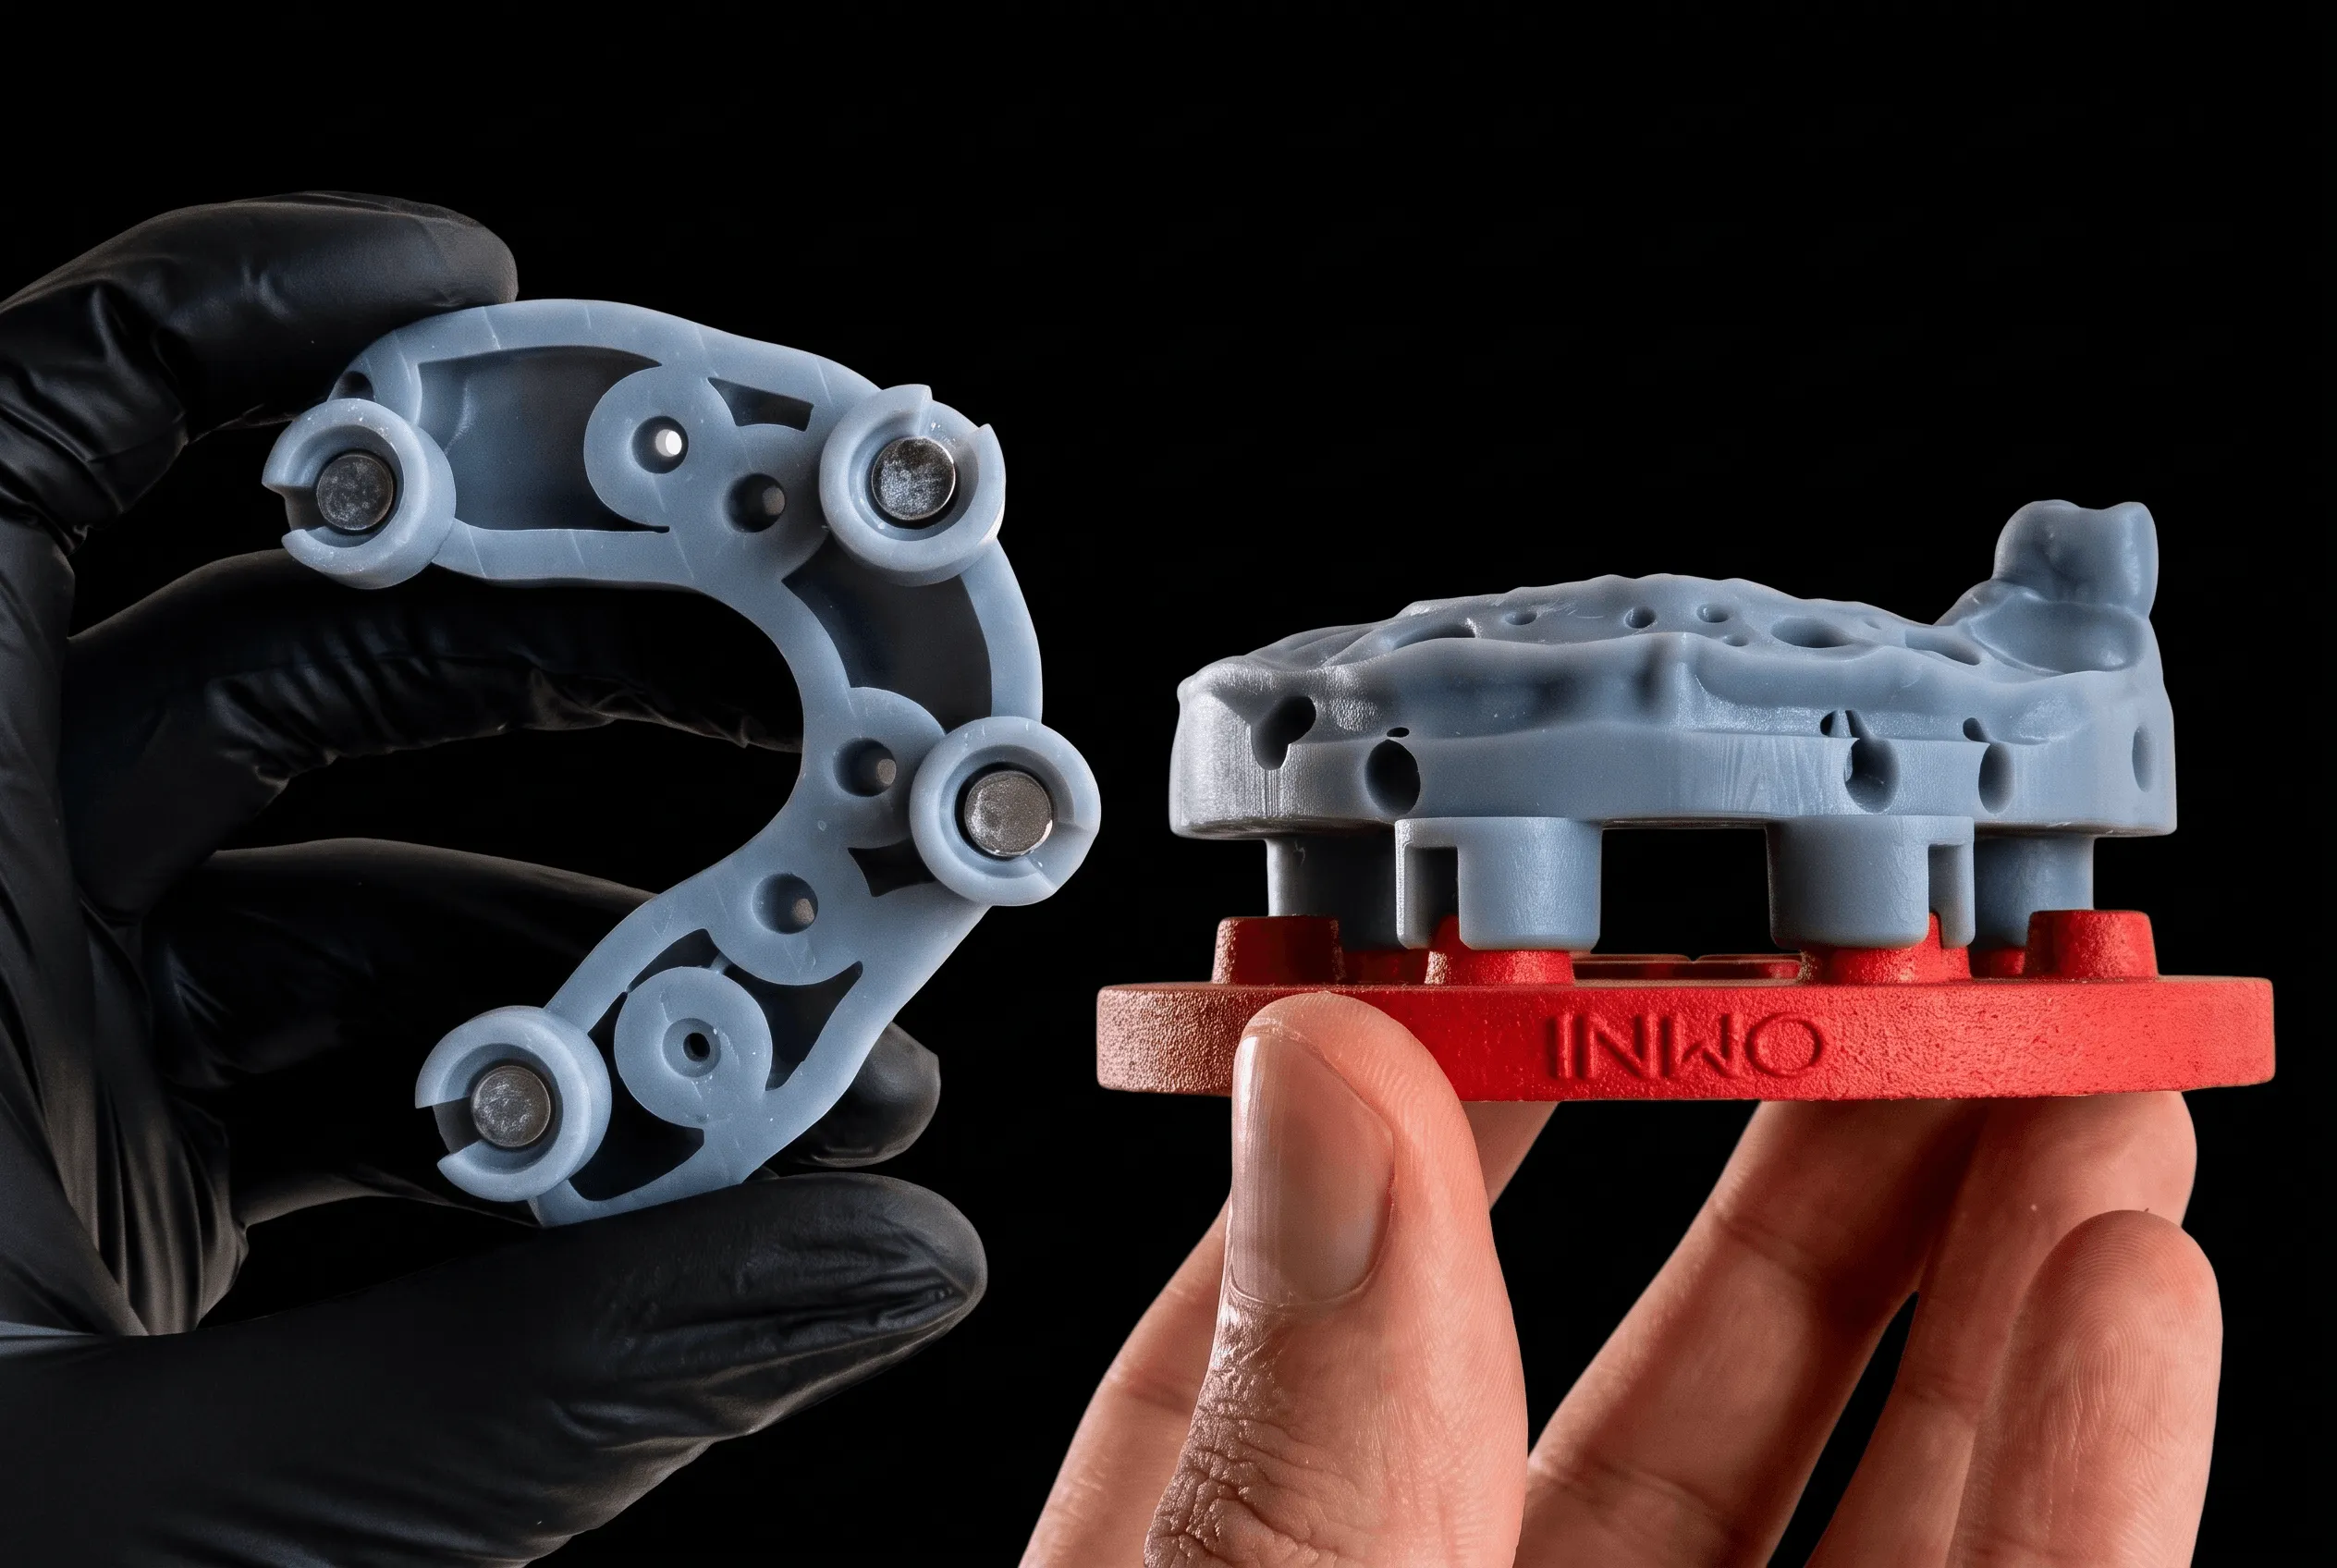
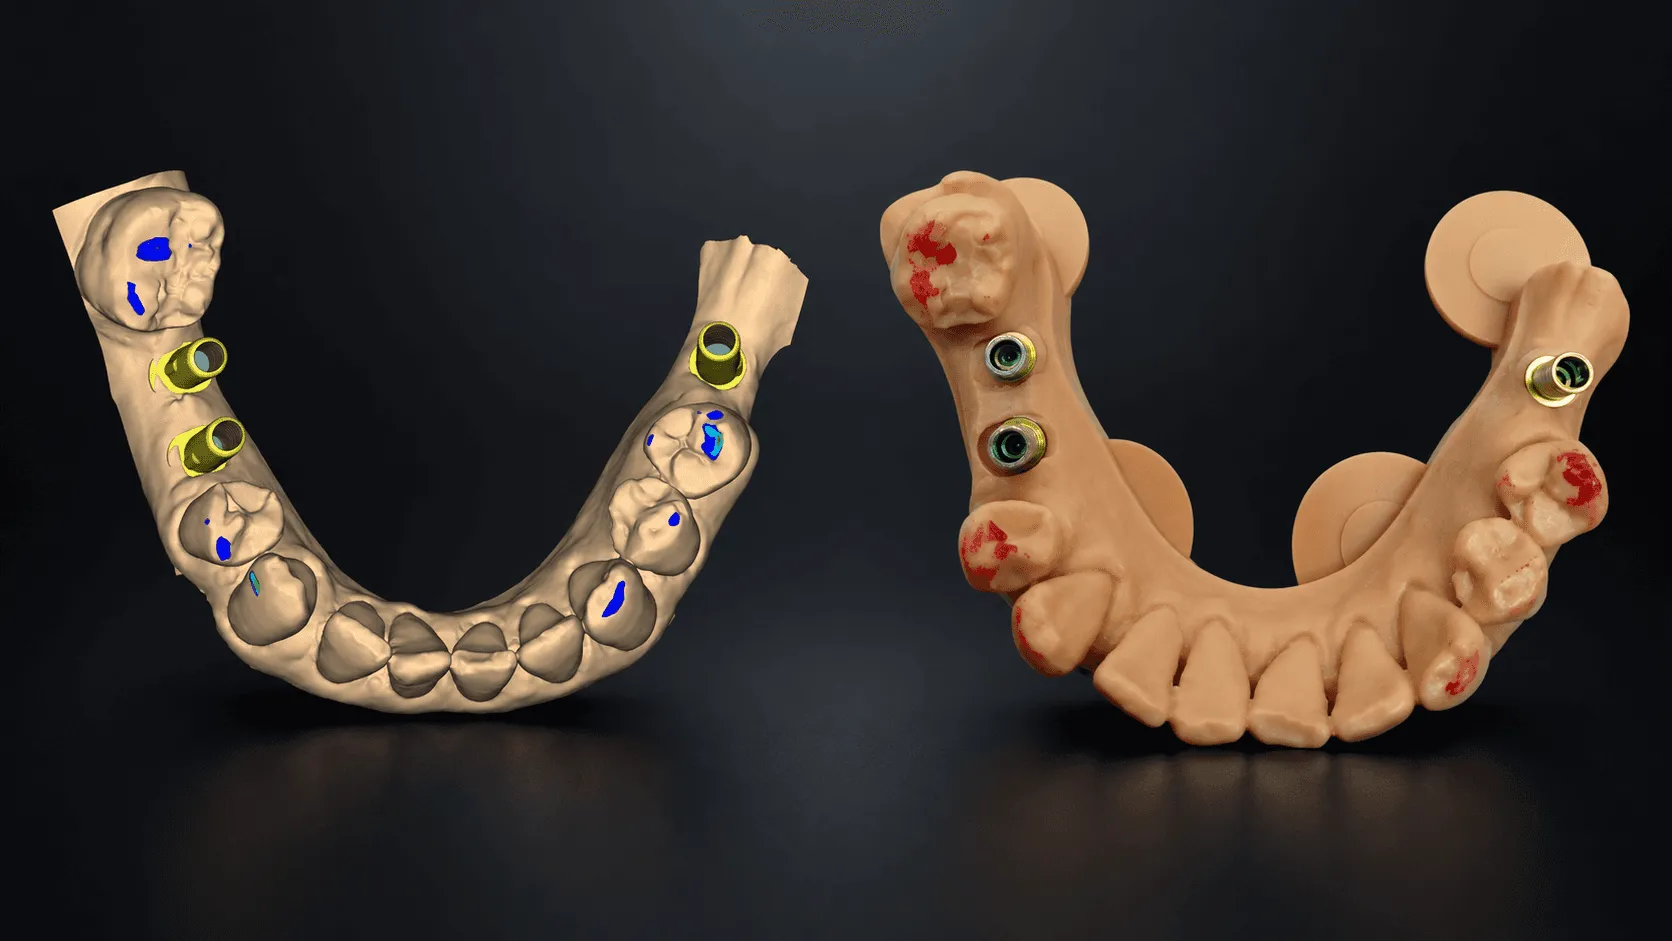
Mandibular All-on-4. Four implant analogs at positions 3, 5, 7 and 10. Bar connection planned. Opposing arch already mounted.
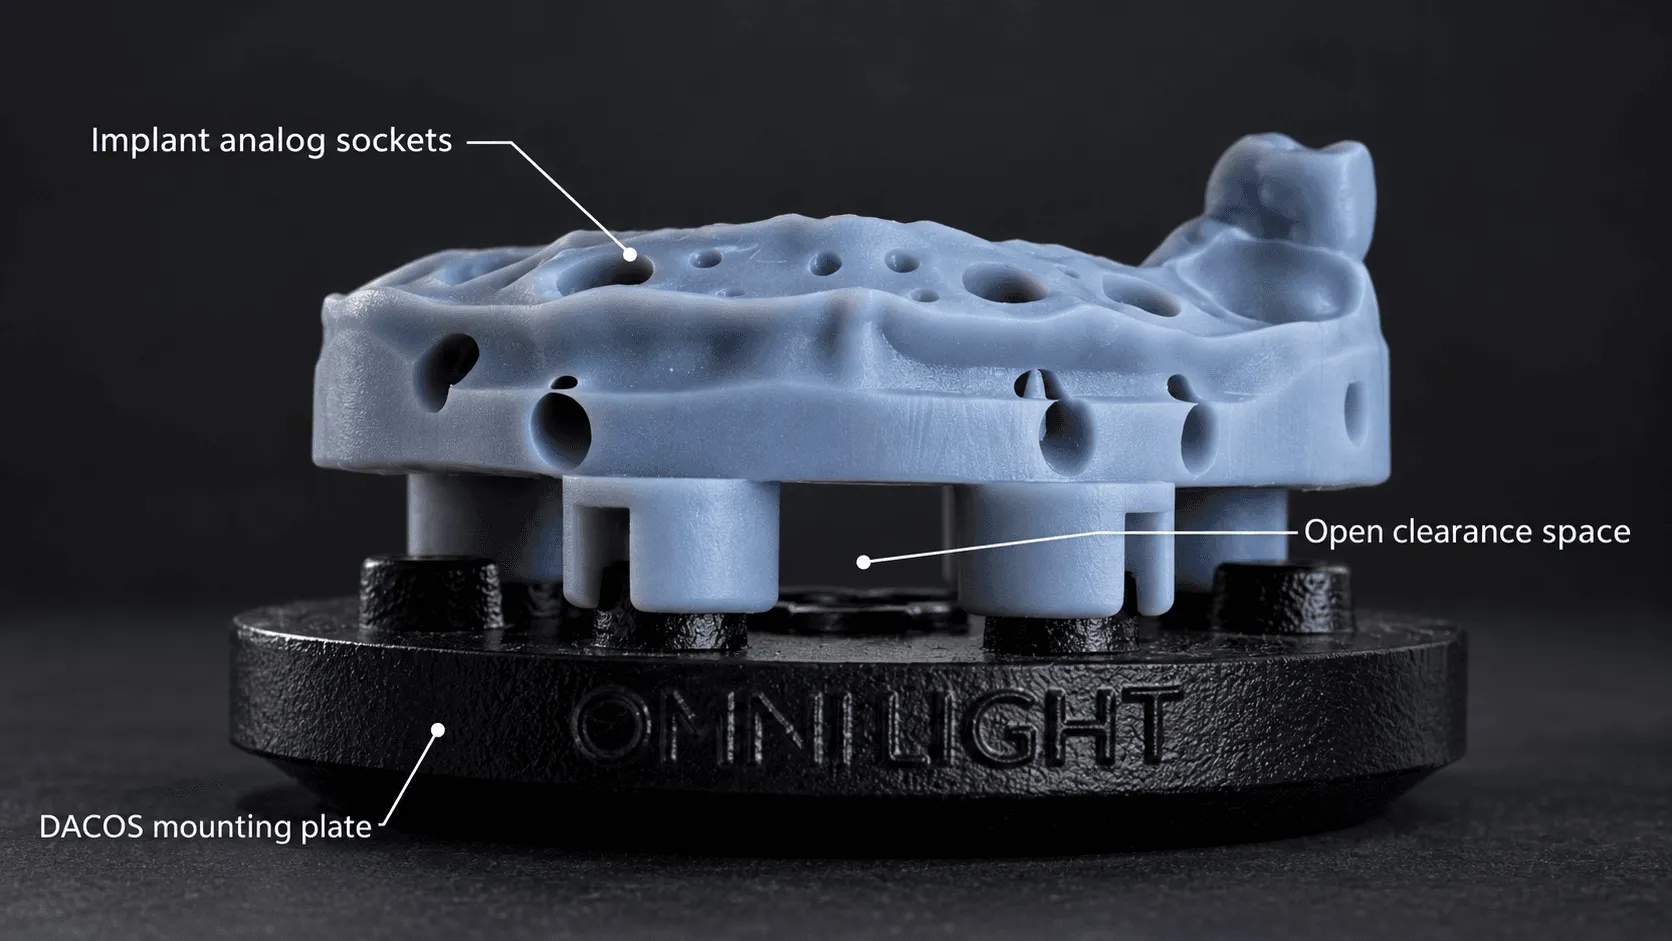
This is the case type that exposes every magnetic mounting system on the market. The analog housings sit exactly where a conventional magnetic base wants to place its magnets under the ridge, in the load path, right down the centre of the arch. The technician is then left with three bad options: grind the analog housing, shift the magnet and accept an off-axis pull, or abandon the magnetic system entirely and go back to plaster for this one case.
All three are compromises. Two of them are compromises that show up later, at try-in, as a bite that does not match the design.
DACOS Omni does not ask you to choose. The magnet pattern moves — the model does not.
Design Phase
The scan comes into exocad or any CAD as usual. Implant positions are already defined by the scan bodies, so the analog footprint is known before the base is ever built.
Open the DACOS CAD library and select the correct path of DockingMatrix™ base. Instead of a fixed magnet layout, the library presents the configurable position set: nine combinations covering the practical range of arch geometries and analog distributions. The wizard reads the occupied positions from the design and shows which configurations clear them.
In this case, the analogs at 3, 5, 7 and 10 rule out the symmetric default. Configuration 7 — magnets at positions 1, 4, 6 and 8 — clears all four analog housings with margin on every one. The wizard confirms it before a single boolean runs.
From there the operation is mechanical. The boolean applies the ShieldBase™ geometry with the selected attachment pattern: blind seat cavities at the four chosen positions, peripheral lip, stand-off rim. The base is generated as part of the model, not stuck underneath it.
The model exports as a single STL, oriented for flat printing.
No manual repositioning. No test-fitting the base against the analogs in CAD. No guessing whether the fourth magnet will land in a housing. The interference problem was solved at the configuration step, before geometry existed.
Design time added over a standard single-unit model: under two minutes.

Print and Preparation
Print flat on the build plate. Same printer, same resin, same parameters as the TrueZero™ calibrator this is the point of printing your own calibrator: the model and the reference share every source of dimensional error, so those errors cancel rather than accumulate.
Post-cure per your standard protocol. No special handling for full-arch.
The ShieldBase™ geometry prints clean. Flat orientation means no supports in the contact zone and no support witness marks on the mating surface — the surface that defines the model's position is the surface that never touched a support. Blind seat cavities come out sharp, without the resin pooling you get when a seat is printed as an open pocket at an angle.
Magnet placement with GlueJet: adhesive into the blind seat cavity, press the magnet home, UV cure. The blind seat sets depth and axis for you — the magnet cannot sit proud, cannot tilt, cannot creep during cure.
Four magnets. Roughly two minutes, including cure.
Mounting and Verification
Dock the model on the calibrated DACOS plate.
Coupling is immediate. The blind seat geometry is self-aligning, the model pulls into position rather than landing somewhere near it and needing a nudge. There is one seated position and the model finds it.
Close the articulator. The incisal pin returns to zero.
Check the contacts with articulating paper. They match the CAD contact map, same points, same distribution as the design showed on screen. Nothing has moved between the digital design and the physical bite.
Then check what this case was really about: analog clearance. All four analogs at 3, 5, 7 and 10 sit clear of all four magnet positions at 1, 4, 6 and 8. No contact, no proximity flag, no interference under load. Nothing was ground. Nothing was relieved. Nothing was worked around.
Remove the model and remount it three more times. The pin returns to zero on every remount, and the contact pattern is unchanged across all four seatings. Measured repeatability across the remounts stayed within ±0.02 mm — the tested ceiling for this system under controlled conditions, verified here on a full-arch model with analogs in play.
That is TrueContact™ verification: not a number on a spec sheet, but a check you run yourself, on the case in front of you, in under a minute.
What This Means
Full-arch implant cases are the cases that send technicians back to plaster. Not because plaster is better, but because the magnetic system on the bench cannot handle an analog where it wants a magnet.
This one went from design to verified mount in about five minutes, with no compromise at any step. Full-arch, overdenture, bar cases, hybrid frameworks: DockingMatrix™ turns the exception cases into routine ones, because the magnet pattern adapts to the case instead of the case adapting to the hardware.
That is the whole point. The system should never be the reason you change how you work.
Learn how the nine DockingMatrix™ configurations work → 9 Combinations. Zero Analog Interference.
DACOS Omni is protected by international patent pending.